


Hey there 👋 We heard you need some help setting up Placid + Make (formerly Integromat)?
Here are all infos and a complete walkthrough to help you get your creative automation up and running. If you have any troubles you need extra help with,
What can I do with the Placid Make integration?
We offer an officially maintained Make app to connect Placid to your nocode workflows. You can generate images, PDFs and videos with it. In a Make scenario you can use data from other apps (like Airtable, Typeform, etc.) and fill them into the dynamic layers of your Placid template.
Add the Make integration to your Placid project
First, set up a Placid project with a Make integration. Create a new project in Placid, or add the integration to an existing one in the Project Settings.
Create a template
Next, you will need a template for your images, PDFs or videos. A template is a bit like cloze text: You define the basic layout, and decide which elements should be filled dynamically with content during your Make workflows.
You can flexibly decide which type of creative you want to generate from your template later: All templates support image, PDF and video generation.
The template below could be filled with a product title, a price and an image, coming from e-commerce apps like Shopify or Magento. The product visual could also be a video! You're completely free to create custom templates that fit your data.

Create templates in the Templates tab of your Make project in Placid and customize them with our drag & drop editor to fit your project’s brand.
Tips:
- Define meaningful layer names
- Uncheck the option Element is dynamic in the layer settings if that layer will not contain dynamic content (e.g. your logo)
- Fill your layers with meaningful defaults, because these will be the fallbacks we use if your Make workflow does not send any values
Video templates
If you're designing a template for video creation, there are some additional things you should know about. You might want to read our dynamic video guide to learn more about how to set it up.
There are different ways to generate videos with your templates:
- Fill a picture layer with a video file
- Generate videos with layer animations (using the animation settings in the editor)
- Fill a text or picture layer with multiple values so the video will transition through them (for example like a slideshow with multiple photos)
- Combine clips from different templates (e.g. for intros or outros)
You can find some dynamic video examples in our guide to show you demos of these use cases.
Create a Make scenario
The Placid Make integration needs to receive data (e.g. text and images) from other apps to generate your images, videos or PDFs from. Create a new scenario in Make and think about where your data for the generated images will come from: From a Google sheet? From a Typeform? From Slack?
You will have to prepare an Make module of your choice that holds your data.
Check Make's scenario templates or list of app integrations to see which other apps from your stack are supported. If you need help with the scenario setup, you can also
Add a Placid module to your scenario
When you have your data ready to use, add a Placid module to the scenario.
Choose one of our actions:
- Create Image to generate images
- Create PDF to generate PDFs with one or multiple pages
- Create Video to generate videos with one or more clips
- Upload Media to be able to upload media to Placid temporarily to use in your workflow (in case you haven't stored them somewhere else)
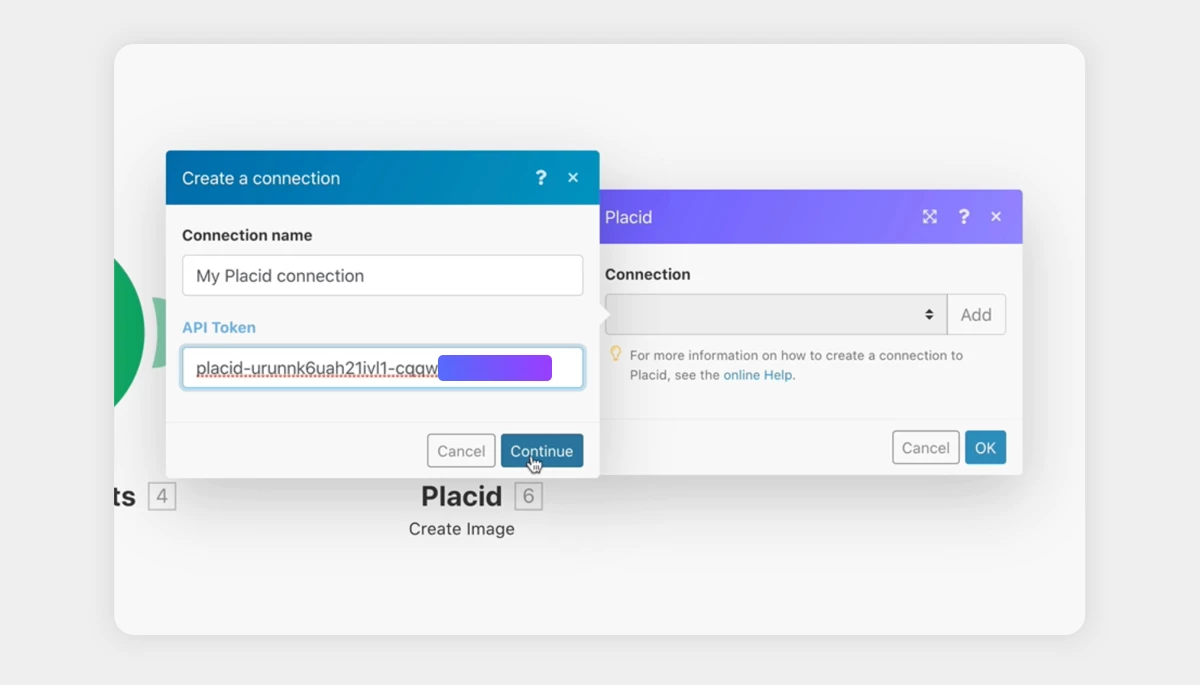
The module needs to be connected to your Placid account via an API token. You can grab it from the API Token tab in the left menu of your Make project in Placid.
Map your data to your template
Once you connected your Placid project, Make will show you a list of all templates you created. Choose the one you want to use.
Make will then display a form that lets you map your data to the different layers of your template.
There will be one block for each dynamic layer of your template, titled with the layer name you defined in the template editor. It shows you all the customization options for the layers.
You can fill text values into text layers, rating values into rating layers, images or videos into picture layers etc. There are also options to change colors or hide a layer. In a Create Video action you can map multiple text or image values to a layer.
If you set up your data module and / or Upload Media action correctly, you will be able to choose values from your dataset to fill into the layers.

Test your workflow
Once you mapped data to the layers of your Placid template, you should already be able to test your workflow by clicking the Run once button in your Make scenario.
The processed output of the Placid module will be an image ID / PDF ID / video ID and an image URL / PDF URL / video URL that you can use in further steps of your scenario. You can also see all of the images that Placid generated in the Log tabs in the left menu of your project in Placid.
Complete your Make workflow
Now that your images are generated, you just need to decide what you want to do with them – like saving them somewhere or posting them on social media.
Complete your scenario with another module of your choice!
Here are some tutorials you can watch and/or read to see how to use Placid in your Make workflow:
- How to create a nocode PDF generation microservice with Placid & Make
- How to create personalized infographics for Year in Review campaigns with Placid & Make
- How to automate your social media posts with GPT-3, Airtable, Make & Placid
We always love to see what creative workflows our customers come up with. Don't hesitate to share with us