


Hey there 👋 We heard you need some help setting up Placid + Airtable?
Here are all infos and a complete walkthrough to help you get your automation up and running. If you are stuck,
What can I do with the Placid Airtable integration?
We offer a custom integration that lets you set up creative automations with your Airtable data. With a Placid Airtable action, you can take data from your Airtable fields and fill it into dynamic layers of a Placid template to generate creatives.
As of now, you can generate images and PDFs with it. Videos will be available soon as well.
Add the Airtable integration to your Placid project
First, you will need to set up a Placid project with a Airtable integration. Create a new project in Placid, or add the integration to an existing one in the Project Settings.
Create a template for your images
You can design templates for your creatives with our drag & drop editor.
A template is a bit like cloze text: You define the basic layout, and decide which elements should be filled dynamically with data from your table later.
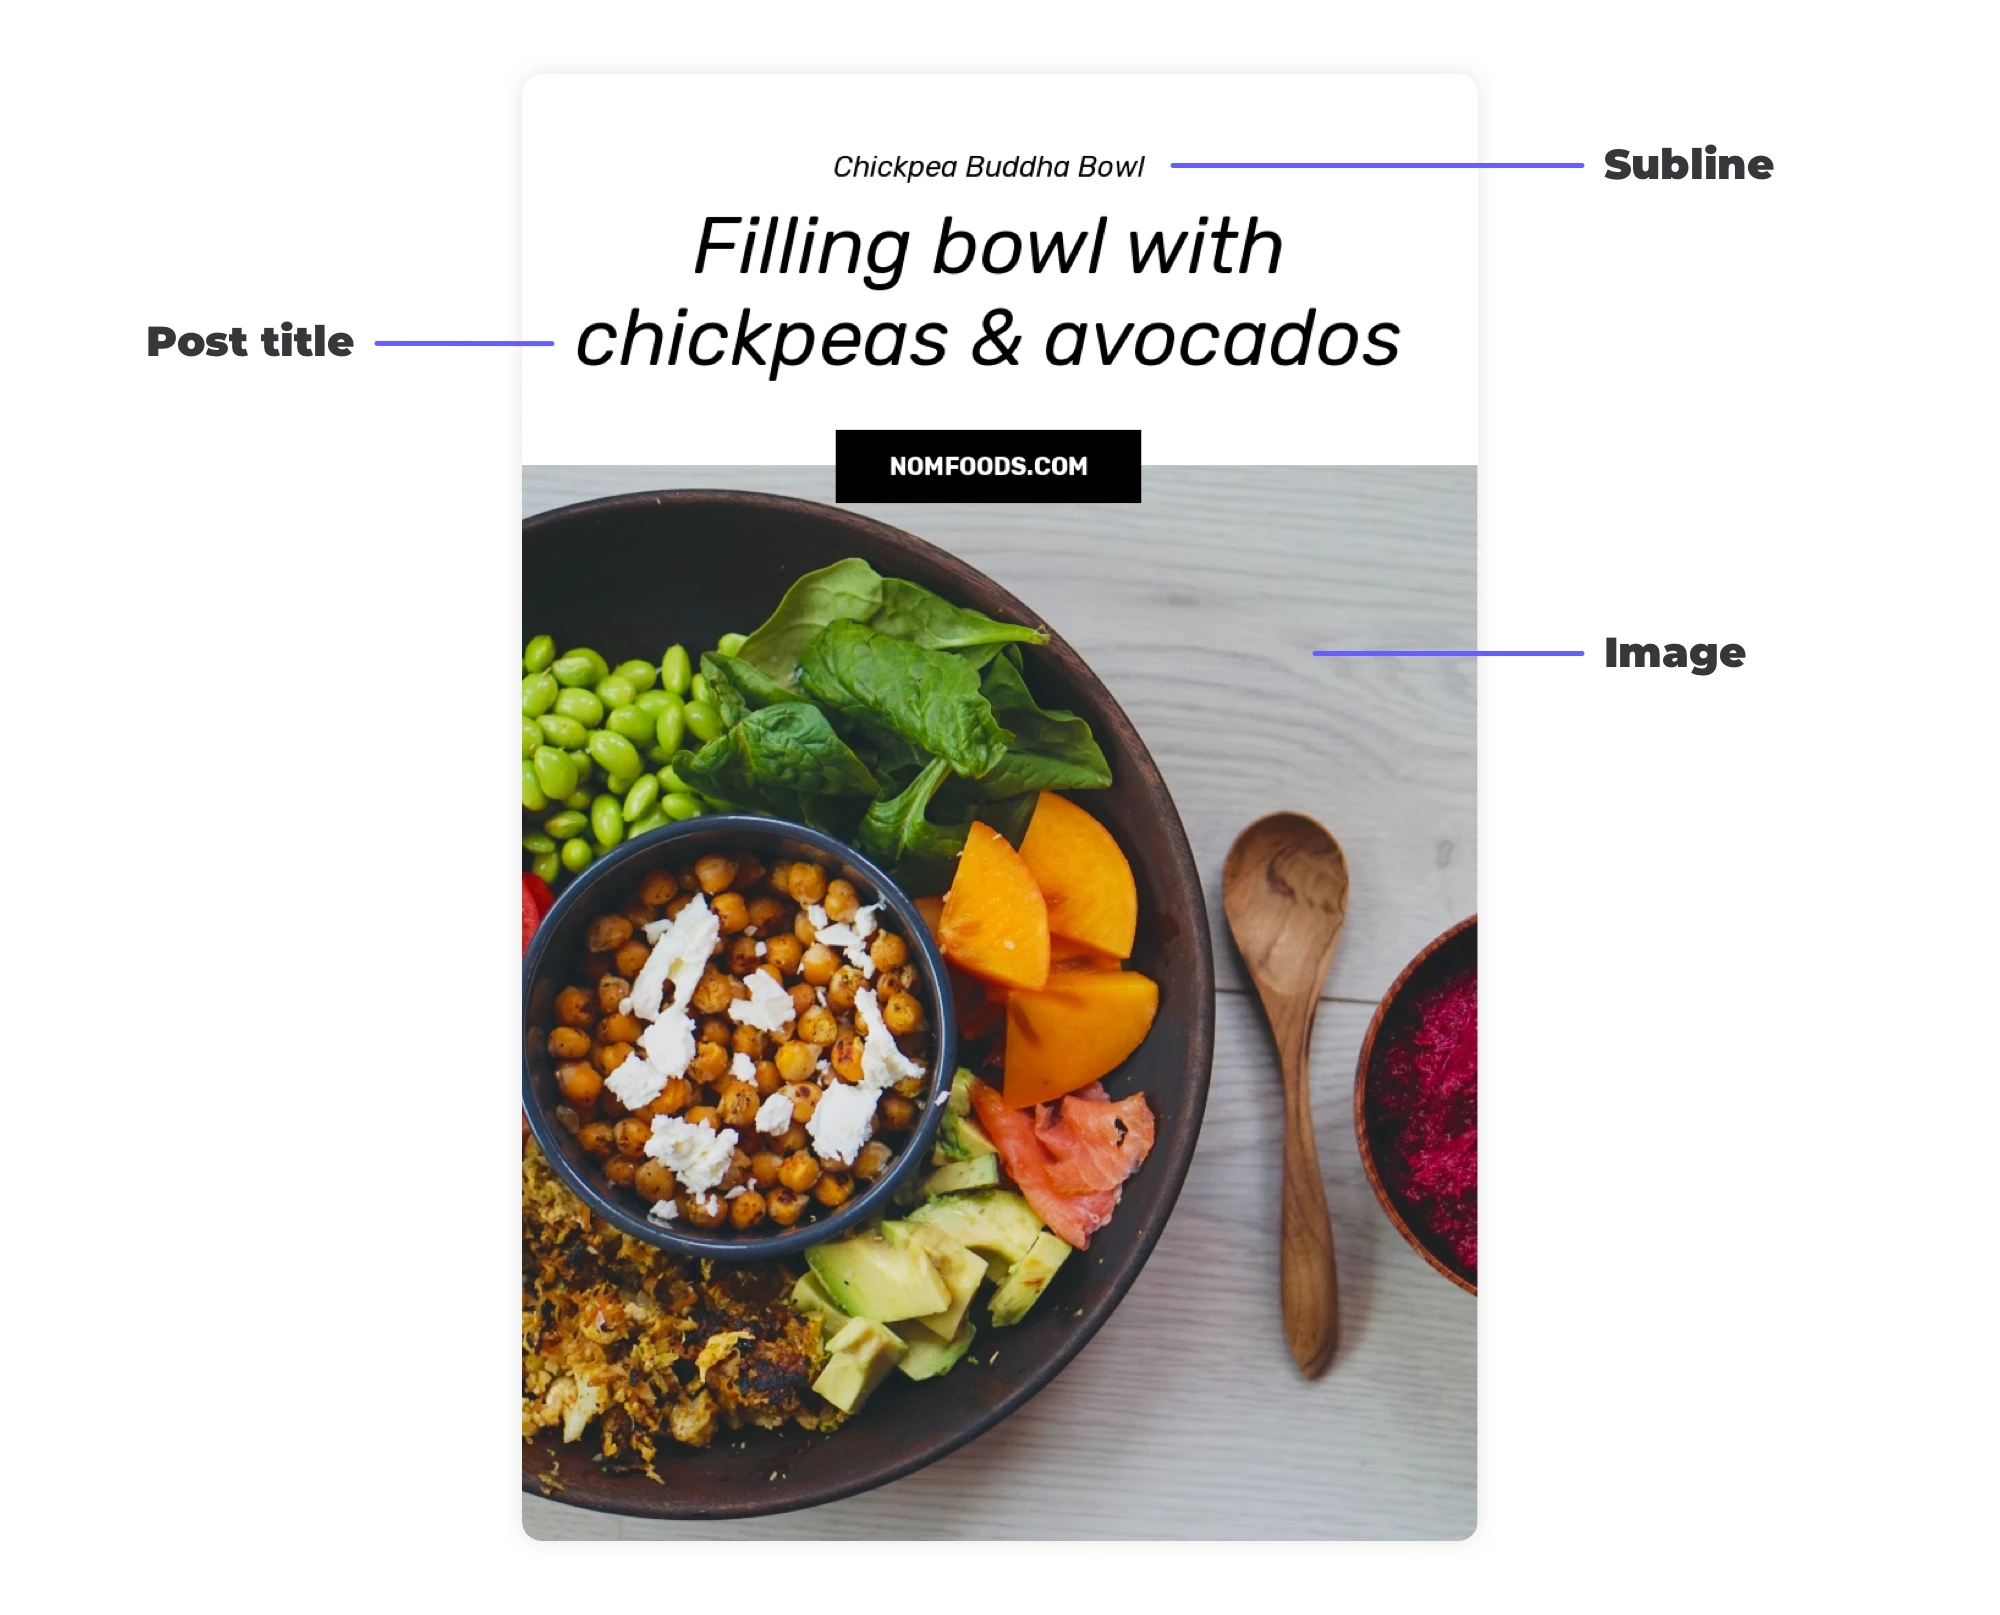
Design a template that fits your brand, or use one of our presets.
Tips:
- Define meaningful layer names
- Uncheck the option Element is dynamic in the layer settings if that layer will not contain dynamic content (e.g. your logo)
- Fill your layers with meaningful defaults, because these will be the fallbacks we use if your Airtable fields are empty
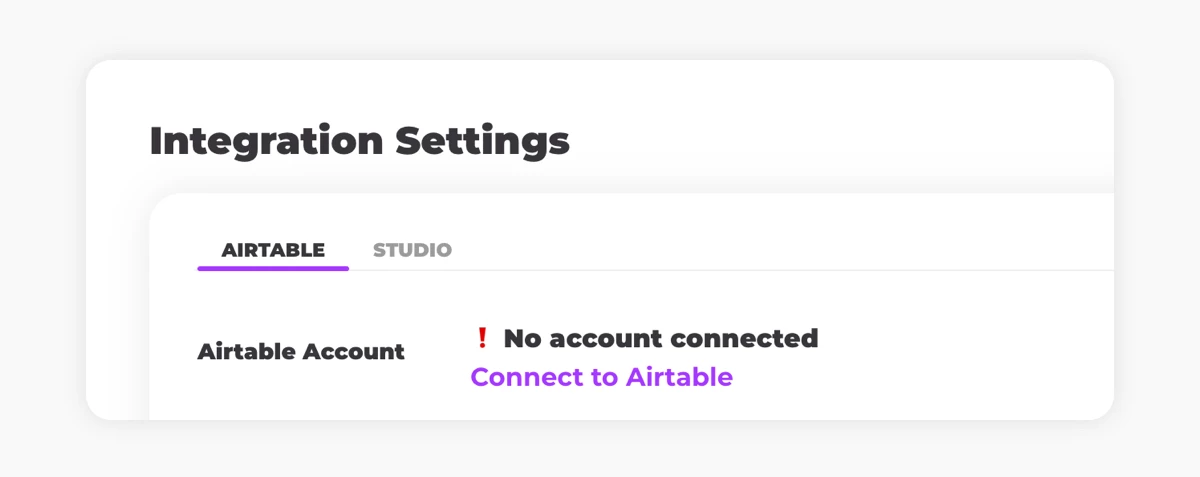
Connect Airtable
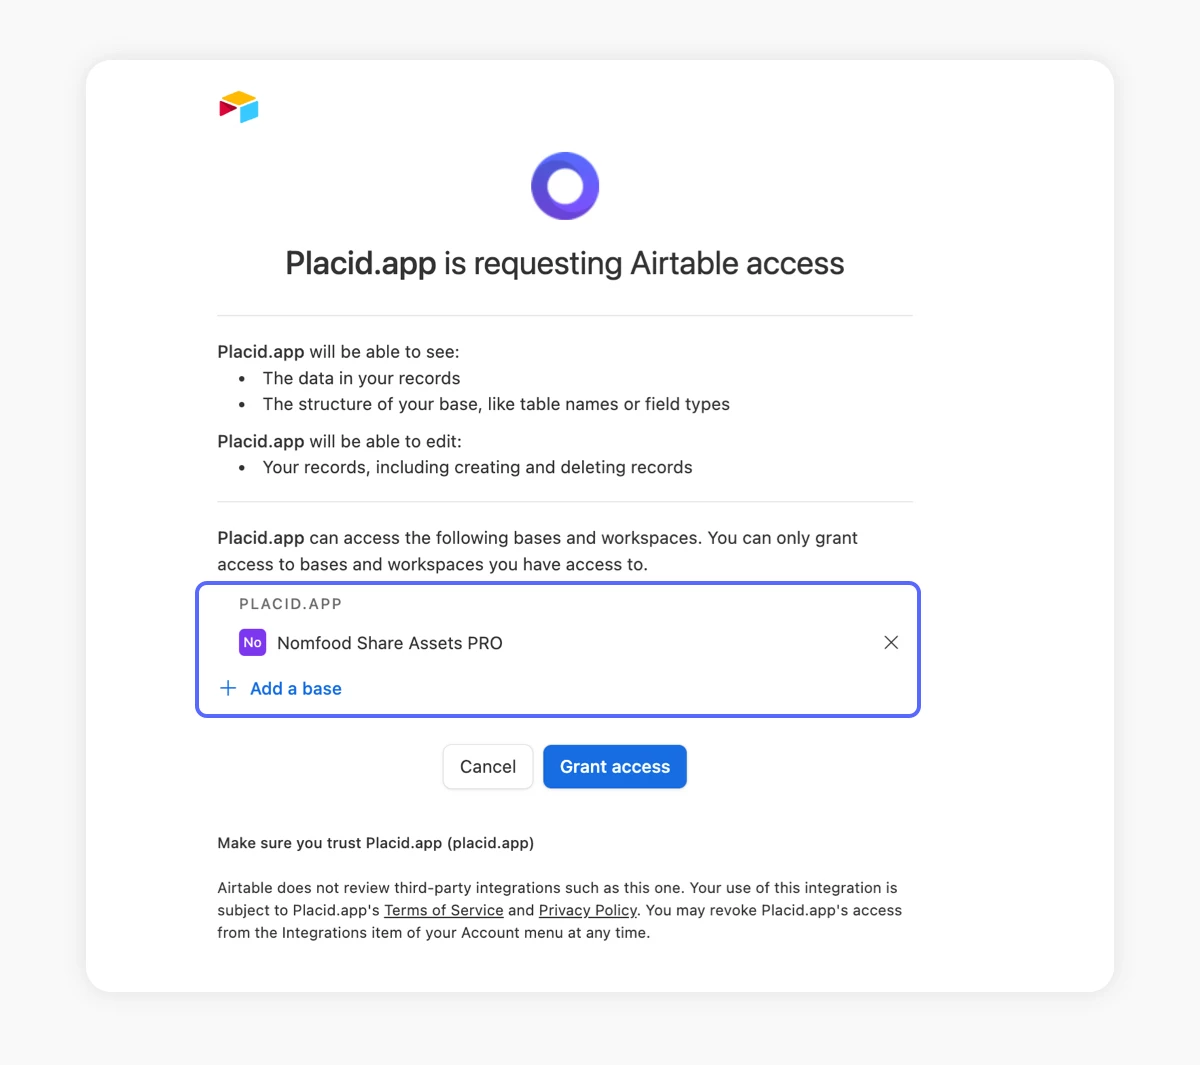
To give Placid access to your Airtable data, you will need to connect your account in the Project Settings. Click on Connect to Airtable in the integration settings.
In the following authentication dialogue make sure to allow access to all bases that contain data you need for your automations.
Create an automation action
With Placid actions, you can set up your image automations. Create one in the actions tab of your project.
Automation settings
Choose basic settings first:
- Title: The title of your action
- Interval: Choose whether the action should only generate images when you start it manually, or if it should run automatically (in a specific interval or if a webhook is called)
- Webhook (optional): Add a Webhook URL that should be triggered after the Placid action is run, e.g. to start another of your automation workflows
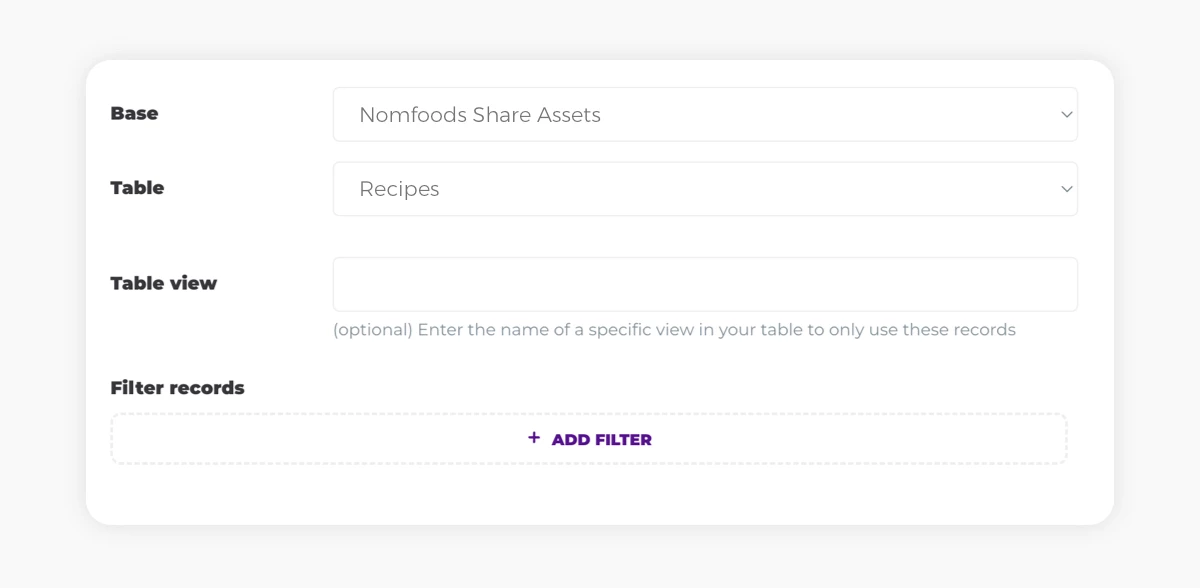
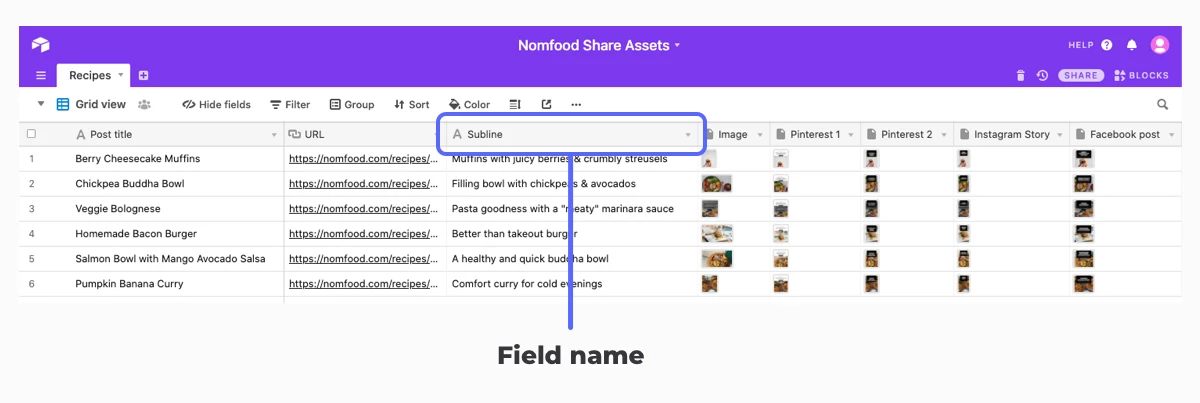
Select table
Then you can choose the base and table that contain the data you want to use. You can also optionally define a specific table view:
Optional: Add conditions to select specific records with filters
Filters allow actions to only generate images from the Airtable records you want. You set up specific conditions, and Placid will only choose records that meet these conditions when running your action.
There are filters available to check if a text field is empty or to compare text or numbers in your fields to your conditions. You can combine them with AND / OR logic. Find a detailed explanation of how to use filters in actions here!


Select a type of creative
Choose between generating images or PDFs in the next step.
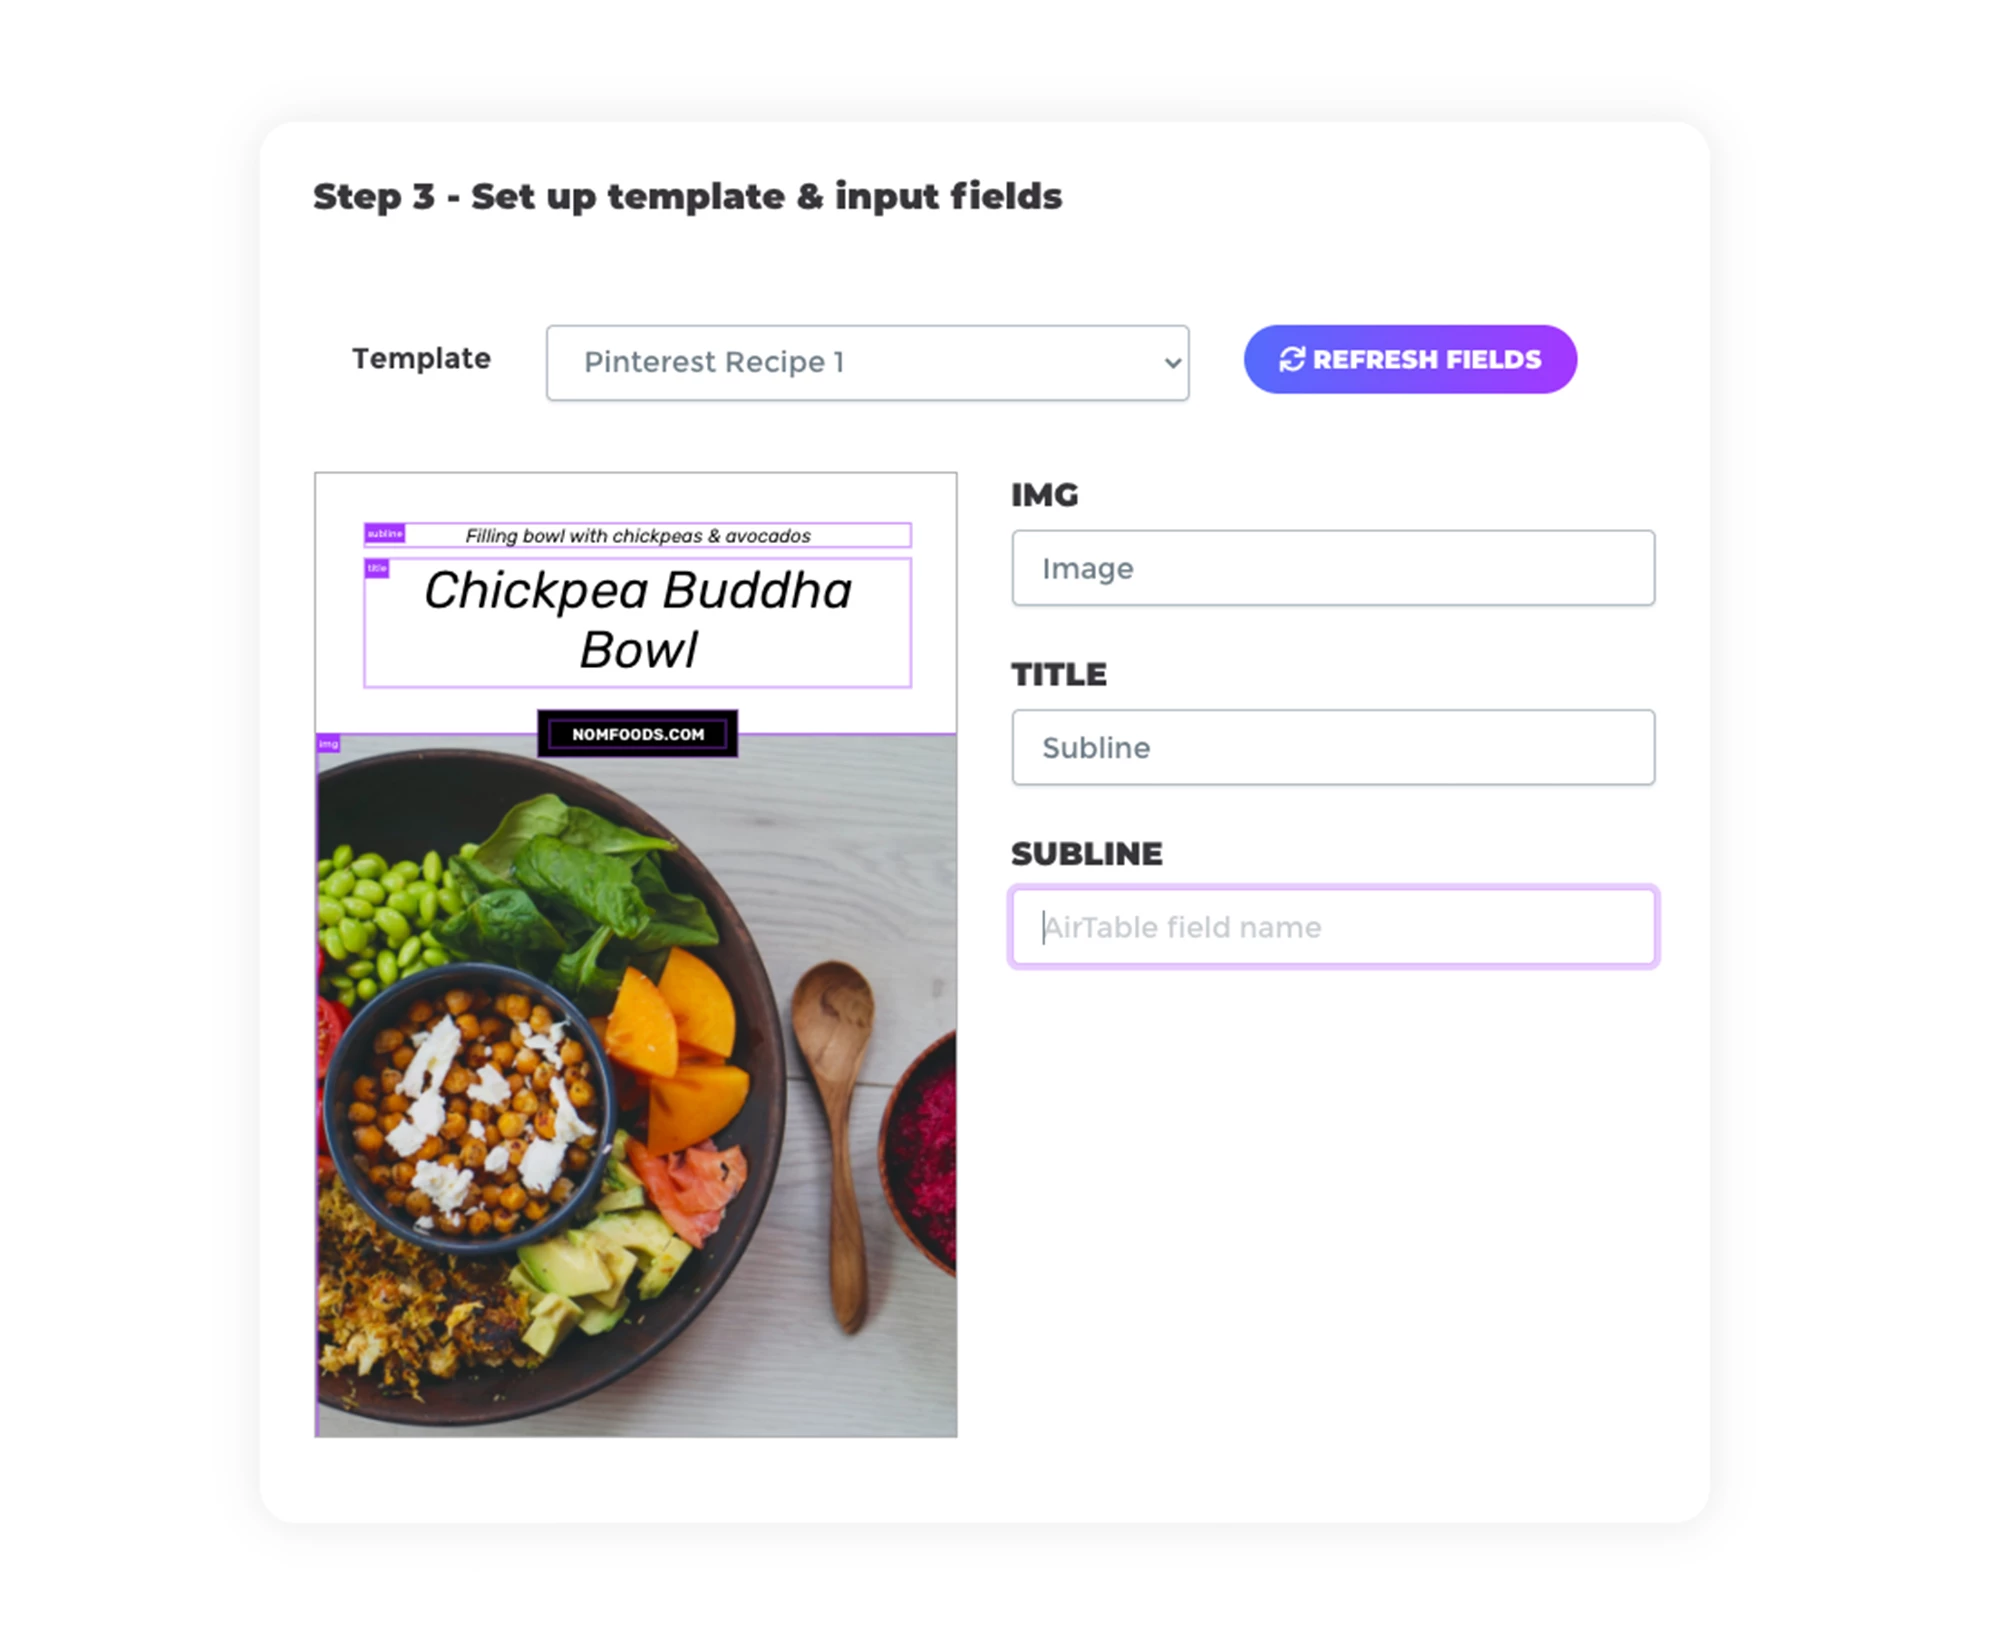
Set up template & input fields
Then you can choose the template you want to use and map your Airtable fields to your template’s elements. Type the names of the fields containing your content (= input fields) into the mapping fields.
Use text, URL or attachment fields as input fields. (Tip: If you want to change colors of dynamic shapes, map a Text field to your shape and put Hex-codes in there!)
Set up output fields
As a last step, define which field we should send the generated images to (= output fields). We can generate them into fields of the type attachment, or send image links to fields of the type single line text.
Run your automation
After creating your action, you can run it manually to generate images for all the content in your rows. Placid won’t overwrite content in any field by default. It will only send images to empty fields, so if you want to regenerate an image, please delete the old ones first.
Use the test functionality to get previews of how your creatives would look like (that will not be sent to your Airtable) without using up credits.
Optional: Setup scripts for more convenience
In your project settings, you will find two custom automation scripts that you can use to make your workflow even better:
Start automations within Airtable
You can set up a button inside your Airtable base to start all your Placid automations.
Install a Scripting app in the Apps tab of your base and paste your custom script from your project settings into the code section. This will give you a convenient "Run" button that starts all Placid actions.
Auto-regenerate images when you update records
Use the power of Airtable's automations to regenerate creatives automatically as soon as you edit a record.
For this you'll need to add an automation in the Automations tab. The trigger needs to be set up to fire when the records you need for your creatives are updated. Then you can let Airtable run a script: Copy and paste the custom script from your project settings, and add the recordID from the trigger event as an input variable.
We hope you’re all set up now and enjoy your supercharged workflow for creating visuals! 🙌