If you want to support organic growth of your app, you better make it easy for your users to talk about it. One great way to do that is to prompt them to share their own in-app achievements and other user-generated content with their friends.
About this tutorial
In this tutorial, I'm going to show you how to implement personalized share images in your Android app with the Placid Android SDK.
What the Placid mobile integration offers:
- On-device generation of personalized images from templates
- Custom template designs
- A drag & drop template editor
- Dynamic content layers with auto-resizing for text and images
- A collection of preset designs
- Easy implementation
The setup takes only a few minutes, and you'll be able to generate unlimited images (offline and directly on-device, no API calls needed).
Alternative: Create share images using screenshots of Android app views
Before we dive in: I think our SDK is a super efficient solution for creating in-app share images (of course 😉), but you can use custom code as well.
For this you'll need to code up a custom view containing your share image design, and then screenshot it.
 public static Bitmap createImageFromView(View view) {

    // Measure the size of the view
    view.measure(MeasureSpec.UNSPECIFIED, MeasureSpec.UNSPECIFIED);

    // Create a bitmap matching the size of the view
    Bitmap shareImage = Bitmap.createBitmap(view.getWidth(), view.getHeight(),Bitmap.Config.ARGB_8888);
    view.layout(0, 0, view.getMeasuredWidth(), view.getMeasuredHeight());

    // Bind a canvas to it
    Canvas canvas = new Canvas(shareImage);
    Drawable background = view.getBackground();

    if (background != null) {
       background.draw(canvas);
    }

    view.draw(canvas);

    return shareImage;
}
While the screenshot part is relatively easy, it will take you some time to create the view containing the custom design of your share images. From our experience, it's a back and forth with the design team and it never looks 100% perfect. As devs, it's definitely not our favourite part of developing an app.
For design & marketing teams it's also a bit frustrating: They can't try out new designs or new ways of sharing in-app experiences quickly, because of this development bottleneck.
Placid offers a drag & drop editor for dynamic image templates that can be created directly by your designers. It's very flexible and saves you a lot of time that you would otherwise spend pixel-pushing a layout.
What we're going to build: Share images for a book tracker app
In this tutorial, we're going to create share images for our imaginary book tracker app Finereads.
Our app lets users discover books, organize them in collections, and log & review books they read. They can also share their collection and achievements with friends.
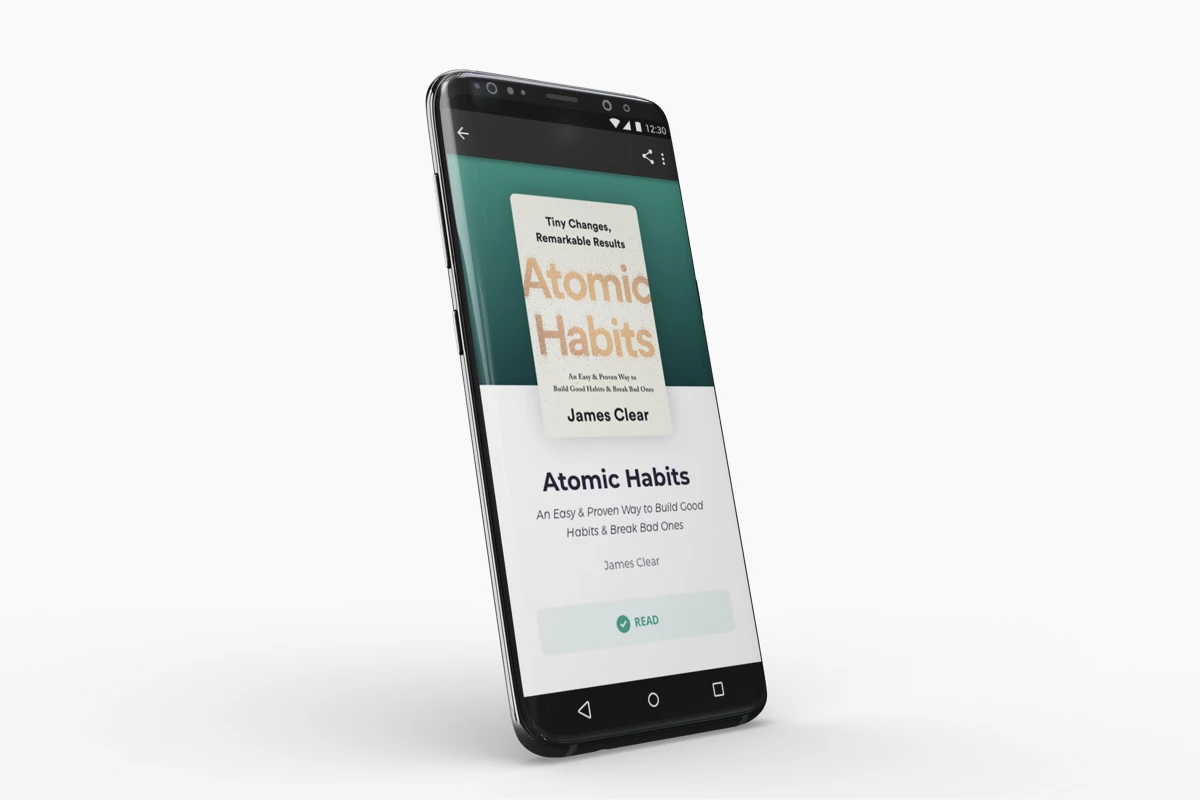
Targeted at book rats, Finereads wants to build a large community of readers to gather reviews and to feed the algorithm for book recommendations. To help achieve that goal, we're going to implement auto-generated share images for every book our users read, so they can share it in their Instagram stories.
Ideally, they will want to show off to their friends ("Look, I've read a book!") and share their experience. We're helping them to look well-read in front of their network, and they spread the word about our app. A classic win-win!
To support sharing our platform often, we'll be creating images to share via stories after having read and reviewed a book.

We're going to focus on generating these personalized images and social sharing, leaving out the actual share screen UI.
What you need
If you want to follow along the tutorial, you will need a Placid account – you can sign up for free. I'll also assume you already have an Android project set up to test in.
Set up a Placid project
In Placid, we first have to create a new project. We'll add a mobile integration to be able to use the Placid Android SDK for image generation.
If you prefer to use an existing Placid project, you can add a mobile integration to it in the project settings.
Create templates
Next, we'll add Placid templates for the designs of our images. We offer some preset designs you can use if you're not a designer – or you can hand this off to your design team completely 😉
We'll add a new template in our Placid project in the Templates menu, choosing the Story size (use the preset size or set the canvas to 1080x1920).
Using the drag & drop editor, we're creating dynamic text and image layers for the values we're going to personalize later: The user's avatar, the book cover and the link to their profile.
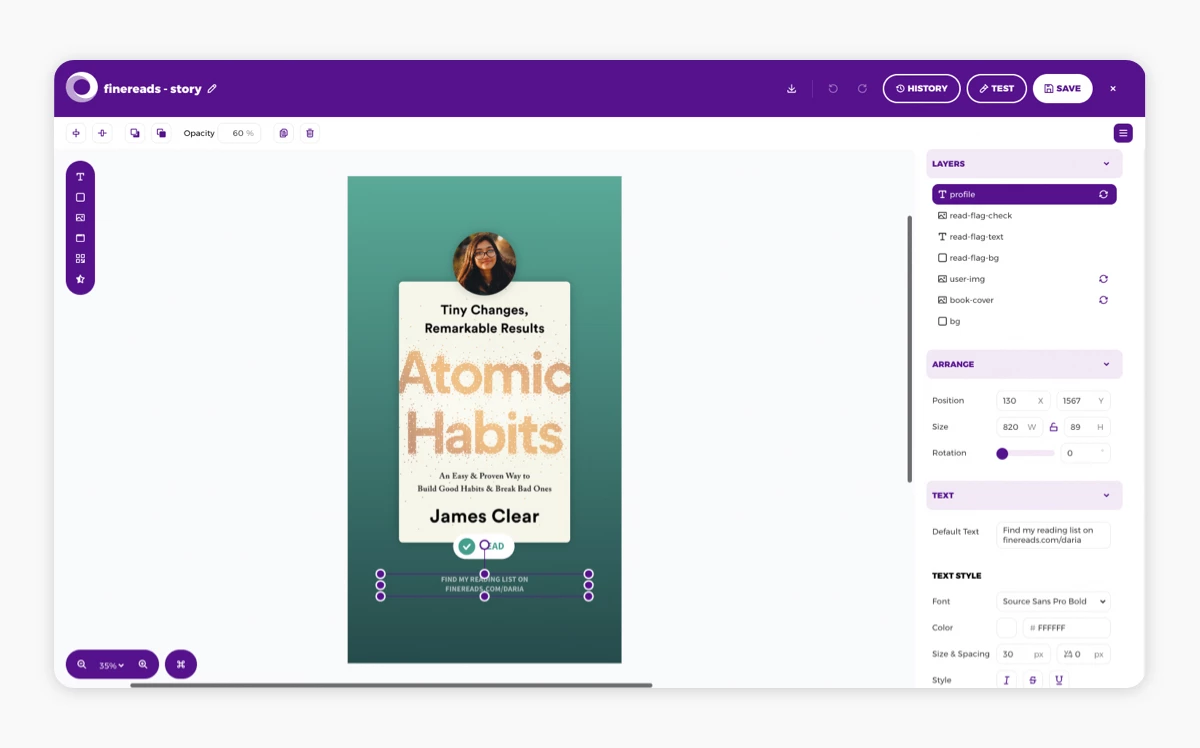
The text and images we use in the template are used as default values that will be replaced later. We recommend using real values to test how they are going to look in the layout you're designing.
The layer names are going to be used later to identify and fill them via code, so use names that make sense to you. By default, all layers are dynamic - but you can switch layers like the logo or design elements like cards to static using the 🔄 symbol in the layer list.
Get your (demo) SDK license
Next, we're going to add a (demo) Mobile SDK license to our Placid project to be able to download and package the templates in our app for on-device image generation.
Go to the project settings and switch to the Mobile tab in the Integration settings panel. There, you can add a demo license for testing (or a full license if you already have a Placid subscription).
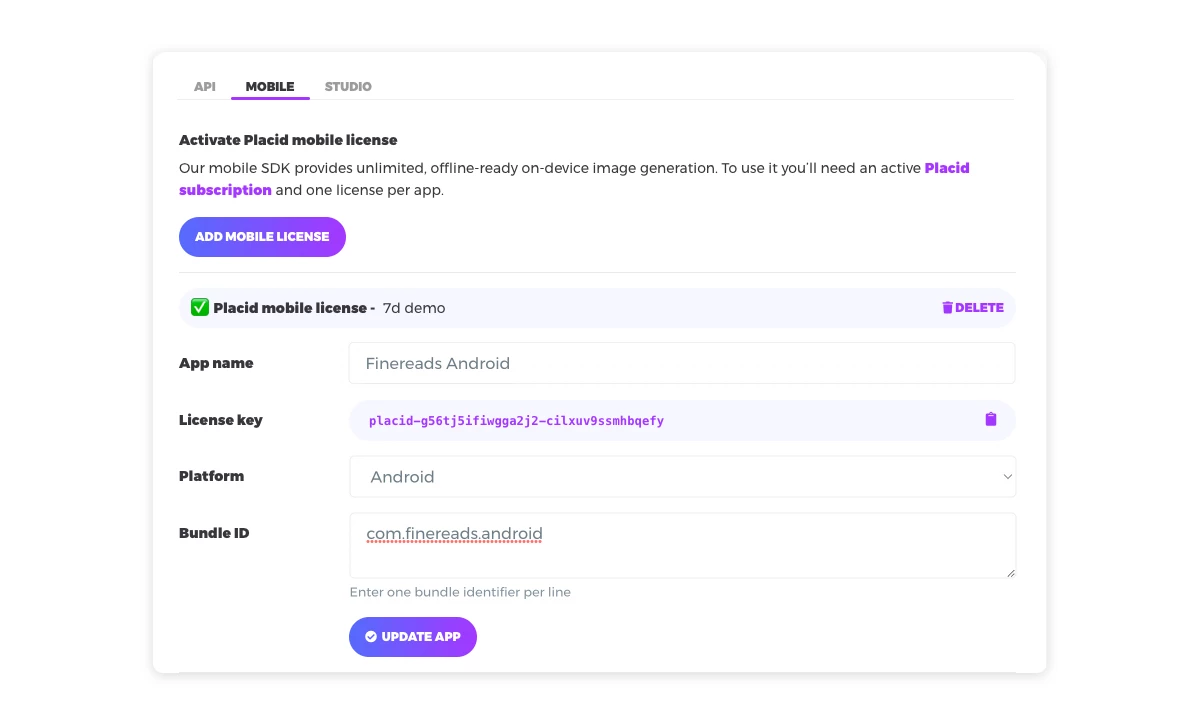
Keep your license key handy for the configuration of the SDK in a few minutes!
Download your templates
Back in the Templates menu, we're using the Integrate button of our template to configure a downloadable template package that we'll use with the SDK later.

In our case, we'll choose the template we just designed.
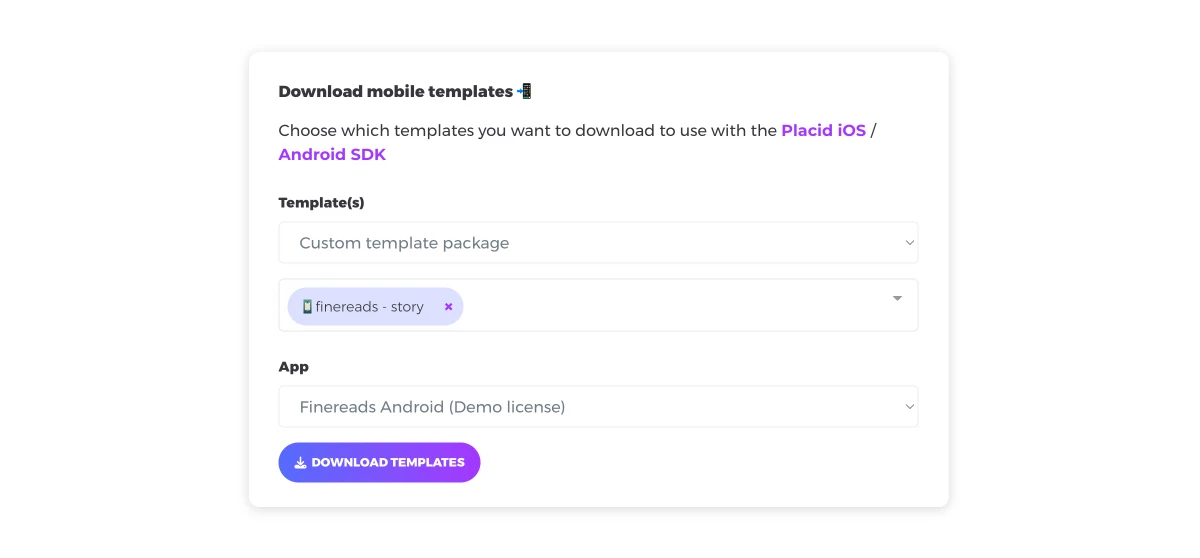
There's an interactive code demo in the Integrate dialogue as well, so you can explore how template modifications are done. You can play around a bit to get a feeling for the functionality, or switch right into your Android Studio project now.
Integrate the Placid Android SDK
First, copy the template package to a project directory of your choosing.
Then we're going to integrate the Placid Android SDK into your project by adding our JitPack repository to your build file. You can find the detailed installation instructions in the SDK repo on Github.
Configure the SDK with the path to your templates and the license key from your project settings.
PlacidSDK.configure(
    licenseKey = "your-placid-license-key",
    bundleResId = R.raw.placid_templates,
)
Generate images from Placid templates in your Android app
In the next steps we're going to call one of our templates and generate an image with custom values from it.
Retrieve your template
Find the ID of your template in the Template menu in your Placid project to retrieve it.
val template = PlacidSDK.getTemplate("bm0ipoefu")
Modify layer data
Now we're ready to fill our data into the dynamic layers (user profile image and link, book cover) of our templates to render a personalized image for our users.
To do so, we have to call the dynamic layers of our template (using their layer name) and modify their properties. In our example, we're only changing their content (text and image URLs), but Placid also offers customization of colors, borders, visibility and more. You can find all properties in our API documentation!
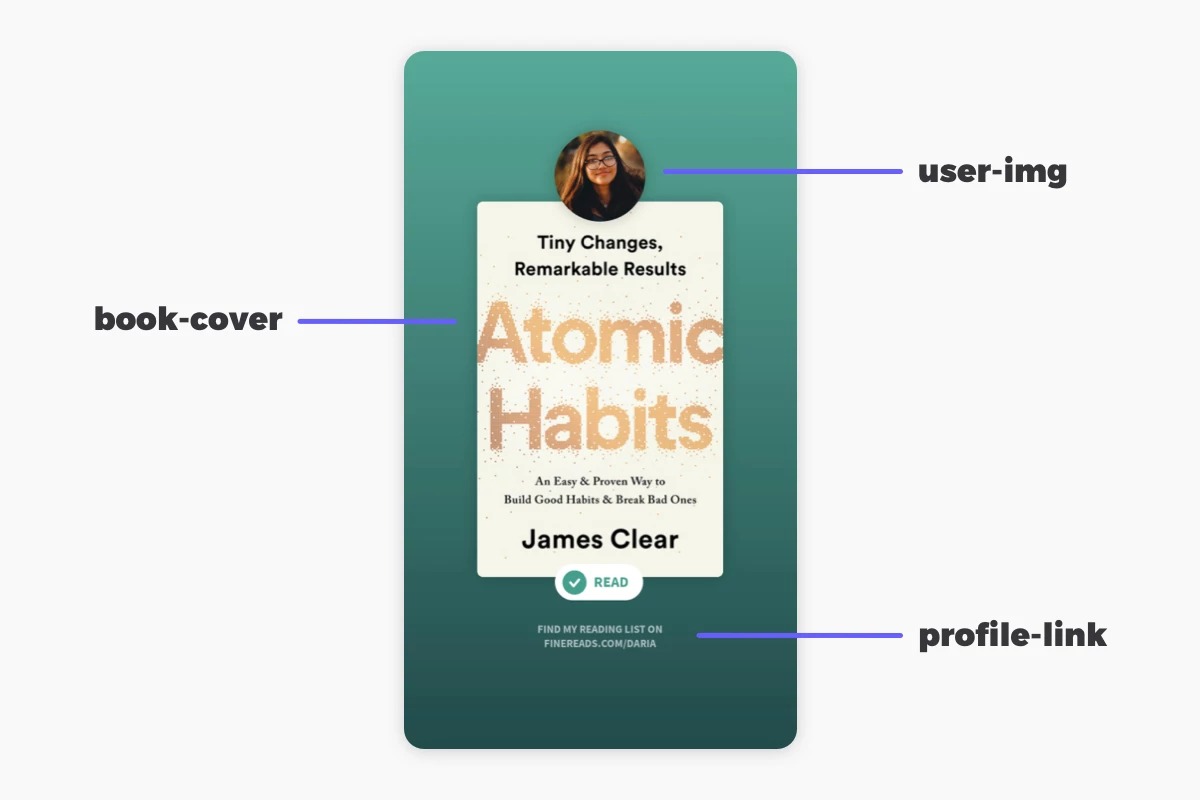
template.textLayer("profile-link") {
    text = "Find my reading list on finereads.com/" + userName // custom variable containing username string
}

template.imageLayer("user-img") {
    bitmap = userAvatar // example variable containing a bitmap
}

template.pictureLayer("user-img") {
    bitmap = bookCover // example variable containing a bitmap
}
These values are static examples – you would of course use your own variables containing user data here.
Render images
Once you have filled the layers with your values, you're ready for rendering.
viewModelScope.launch {
    val placidImage = template.renderImage() //suspended function
}
And we're done! Your generated images are now ready to be used for social sharing.
Share images to Instagram Stories
How exactly your share UI works is up to you: You can for example let your users choose between different share image templates or present them a random one each time.
We're not going to code up any UI today, but to complete the workflow of sharing, I'll walk you through one last code example showing you how to implement a "Share as Insta story" functionality using rich URL schemes for Instagram Stories.
// Instantiate an intent
Intent intent = new Intent("com.instagram.share.ADD_TO_STORY");

// Attach your App ID to the intent
String sourceApplication = "1234567"; // This is your application's FB ID
intent.putExtra("source_application", sourceApplication);

// Attach your image to the intent
Uri shareImageUri = FileProvider.getUriForFile(this, "your_package_name.provider", placidImage);
intent.setDataAndType(shareImageUri, MEDIA_TYPE_JPEG);

// Grant URI permissions for the image
intent.setFlags(Intent.FLAG_GRANT_READ_URI_PERMISSION);

// Instantiate an activity
Activity activity = getActivity();

// Verify that the activity resolves the intent and start it
if (activity.getPackageManager().resolveActivity(intent, 0) != null) {
  activity.startActivityForResult(intent, 0);
}
Within this snippet, we have created a URL for story sharing with Instagram's URL schemes. This code snippet would take the generated image and open it in the Instagram story composer.
What's next?
Now that you know how to create share images, you can think about all the ways you can implement them in your apps.
- Did you know there are customization options for sharing via Instagram Stories? How about adding a personalized sticker that your users can freely resize?
- Create more template variations for other platforms like LinkedIn, Facebook, Twitter or messengers!
You can use Placid for any image you need to generate – on mobile, but also via our API or other nocode solutions. Have fun ✌️


