


You can change the content of your Placid template layers via our API or nocode integrations to generate creatives with different texts or photos. But there are also many more layer attributes that you can customize: Everything from layer visibility to border width, fill color or even position and font can be changed dynamically.
A perfect way to bring more variation to your creative automations is to change the color scheme of your templates on the fly. That could be useful for different reasons:
- You want to use unique colors on your creatives for different topics / blog categories / company divisions etc.
- You want to add more variety to your social media posts or ads by using different swatches from your brand color palette
- You want to personalize creatives for your users or clients with their preferred colors
- ... and more, depending on what kind of creatives you generate with Placid!
Change colors via the Placid API
Let's see how to create a color variation of a template via our API first.
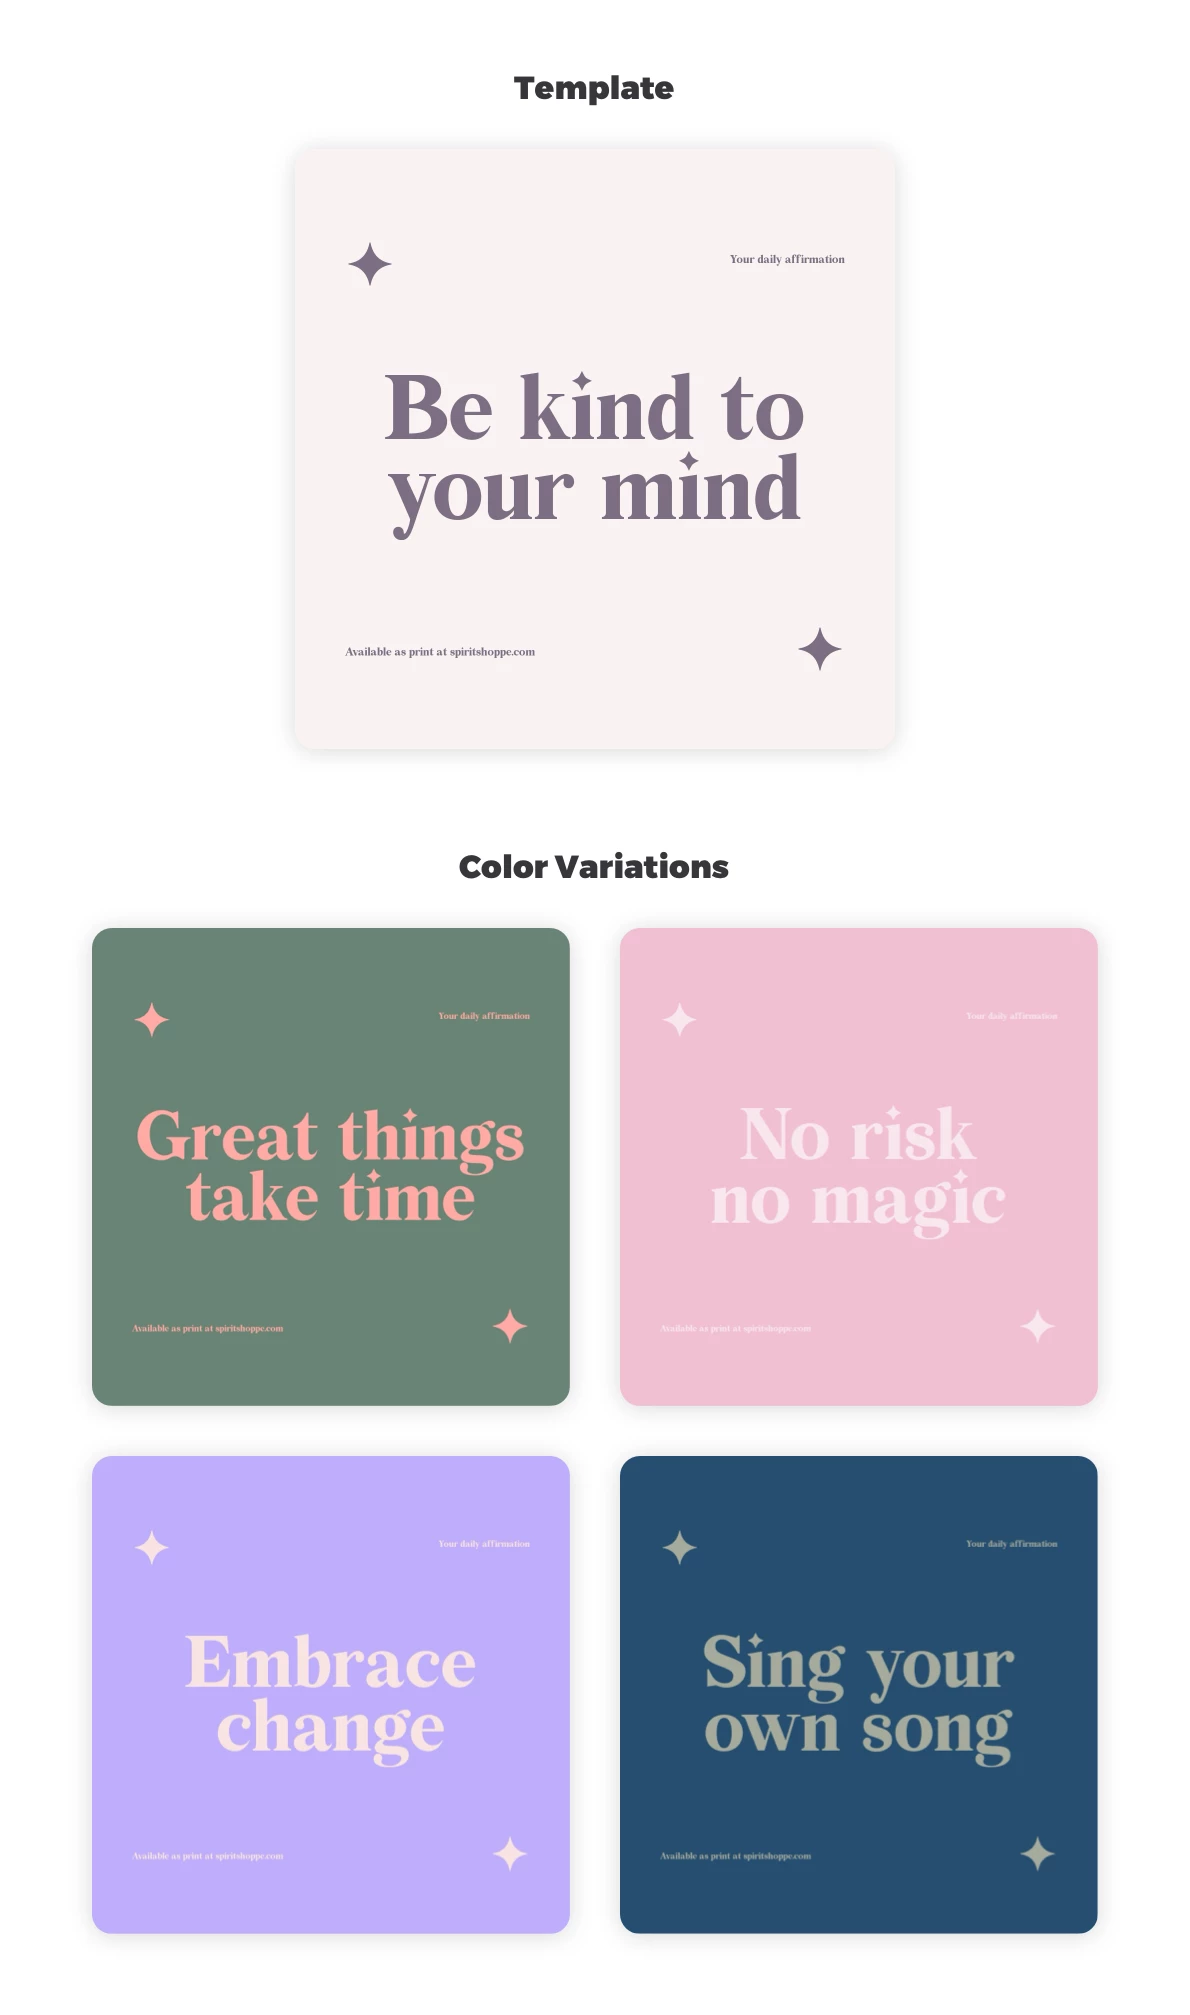
This is an example of what we want to achieve – one template, many variations:
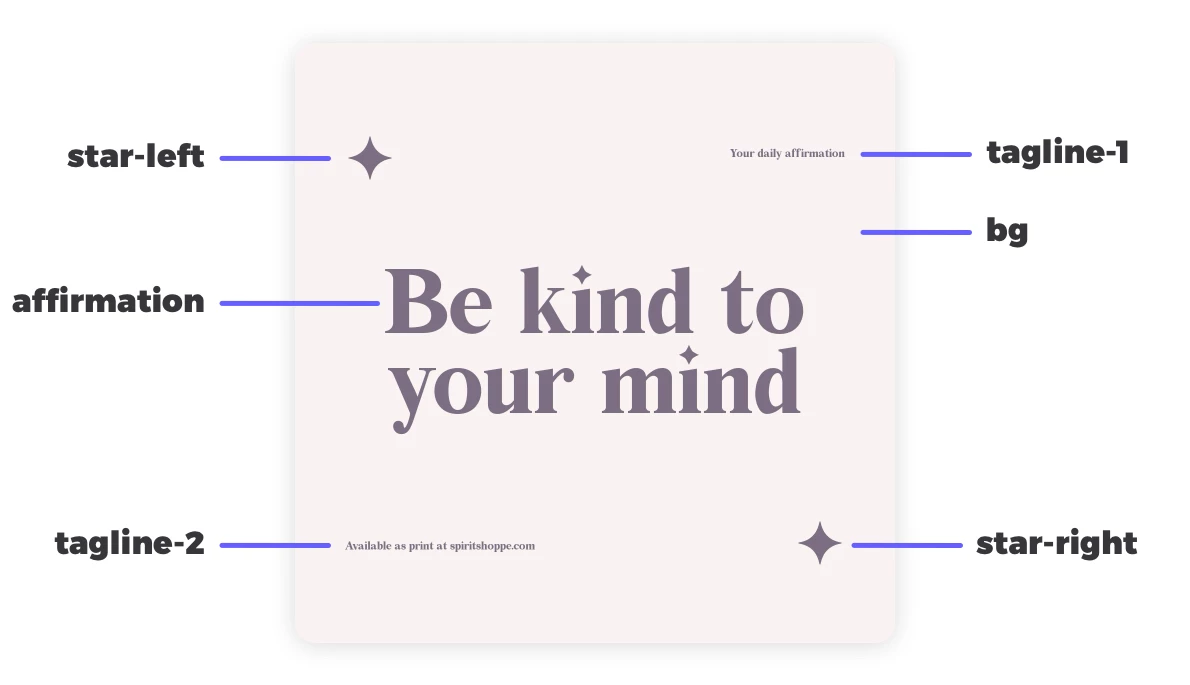
This is how the template we created looks like in our editor:

All our layers are dynamic, as we're going to change the colors of everything in this template in our automation: The background (a rectangle shape) bg, all texts (tagline-1, tagline-2 and the main text affirmation) and decoration shapes (star-1 and star-2 which are custom shape SVGs).
The following code snippet shows you all the properties you would need to change in this template to achieve a color variation. For shapes (including custom SVGs), use the background_color property, for font color use text_color.
// POST to endpoint `https://api.placid.app/api/rest/images`

{
    ...

    "template_uuid": "xxxxxx",
    "layers": {
        "bg": {
          "background_color": "#F2BED1",
        }

        "affirmation": {
          "text": "No risk no magic", // the content of our affirmation changes as well
          "text_color": "#F8E8EE"
        }

        "tagline-1": {
          "text_color": "#F8E8EE"
        }

        "tagline-2": {
          "text_color": "#F8E8EE"
        }

        "star-left": {
          "background_color": "#F8E8EE"
        }

        "star-right": {
          "background_color": "#F8E8EE"
        }

    },

    ...

    // Add other options to customize filename, size modifications, export,..
}
You will need to adapt this example to your own template id and layer names. For more detailed info about available properties and customization options with our REST API, you can head over to our documentation.
Change colors via Placid nocode integrations
You can of course also achieve this via our nocode integrations for the workflow automation tools Make and Zapier.
Placid color settings in Zapier & Make
In your Placid workflow steps in Zapier and Make, you can use the background color and text color fields of your template layers to change them.


Color settings in Placid Studio
Alternatively, you can change the settings manually for one-off creative generation in our Placid Studio. To do so, go to the Studio tab in your Placid project and choose your template.
Then change the fill colors of any shapes with the color picker. Use the + button in the text layer header to add the text color property for customisation, and change these colors as well.
This is how our customization would look like for our example template:

Advanced color variation workflow ideas
If you want to level up your automation a bit more, here are some ideas for you:
- Try randomizing the color scheme for every generated creative to automatically get a different version every time
- Extract the prominent colors of any photos you're filling into your template's media layers to adapt the background or other design elements
- Let your users choose: If you're generating creatives for your users, why not give them the choice to pick their favourite color variations?
I hope you got some inspiration from this post, and I could show you how flexible you can design your creative generation workflows. If you have any questions left, you can always