


If you want to manage how your Webflow pages look when shared on social, you'll come across the Open Graph (OG) settings. Most social media platforms and messengers will use your Open Graph data to create their link preview cards. If they can't find any, they'll just use the content they think is relevant, and often display small link previews instead of nice large cards.
There's a Webflow University lesson on how to set up Open Graph data describing how you can set static Open Graph data and dynamically generated Open Graph titles and descriptions for your Collection pages. This is already super flexible - good job, Webflow!
In this tutorial, we'll go one step further: We are going to generate dynamic Open Graph images for a collection of blog posts. No Photoshop, no Canva - you won't have to handle the images at all. We'll use a custom template that we will fill with content from Webflow later on.
You'll need a Webflow blog for this tutorial (obviously!), as well as an account for Placid. This is a nocode workflow, so you won't need any coding skills. Our native Webflow integration makes it easy to set up. If you just want to try it out, you can use our free trial to see how it works!
Video Tutorial

Create a Placid project and template
In Placid, create a new Webflow project to start your setup.
Within the project, you can create a template. For this tutorial, we used one of our Open Graph presets that contains elements for a post title, an author and an image.

You can choose any other preset design you want, or design a template yourself with elements that will be filled with content from your Webflow collection fields later.
Connect your Webflow site
Connect your Webflow site in your Placid project settings by authorizing us to access your content and update it for you.

Create an automation action
Now comes the exciting part: Automatically generating images and adding them to your pages / collection items!
First, go to the Actions settings of your Placid project and add a new action. You'll see a form that will help you set up your automation:
- Give your action a name. I just used "Open Graph images".
- Choose the interval in which the action will be triggered: Manual, Monthly, Daily or when a Webhook gets called by Webflow (usually when you publish the site). For this tutorial, I chose manual, so I have to start the action myself in Placid when I want to generate new images. But I describe how to set up the Webhook below as well! 👇️
- Choose the Webflow collection you want to generate images for.
- Choose the template you want to use and map your Webflow fields to the elements in the template: This defines where Placid takes the content from, and where to put it. I mapped the post's title and thumbnail to the title and image fields of the template, and chose the name, avatar and role of my referenced author field to be filled in the author block.
▶ Watch video of this step

- Define to which field we should send the image. I use a custom collection field named OG image that I added to the collection in Webflow first.
- Save the automation and run it to generate your images (or hit "test" for a test run) -
▶ Watch video of this step

Set up your Placid action to (re-)generate images when you publish your Webflow site (optional)
In the video, I showed you how to run your automation manually, but also mentioned the possibility of running the action every time you publish your site. This will make sure that every new item gets an image and older items get a new image when you edit their content.
To set this up, use the Webhook settings for the Action interval of your automation. You'll then see a placid.app Webhook URL on your automation action.

You can create a Webhook with the trigger type "Site publish" in your Webflow project settings and paste this URL. This tells us to check for changes and we'll update your images.
If you want to completely set-and-forget this, you can activate the Publish live option in your Placid image automation – else your new image will only be added on staging so you can check it first.

We offer unlimited generated images in all of our plans, so you won't have to think about hitting any limits with automating this - no matter how often you change your mind about your article's title 😉
Set up your Open Graph images in Webflow
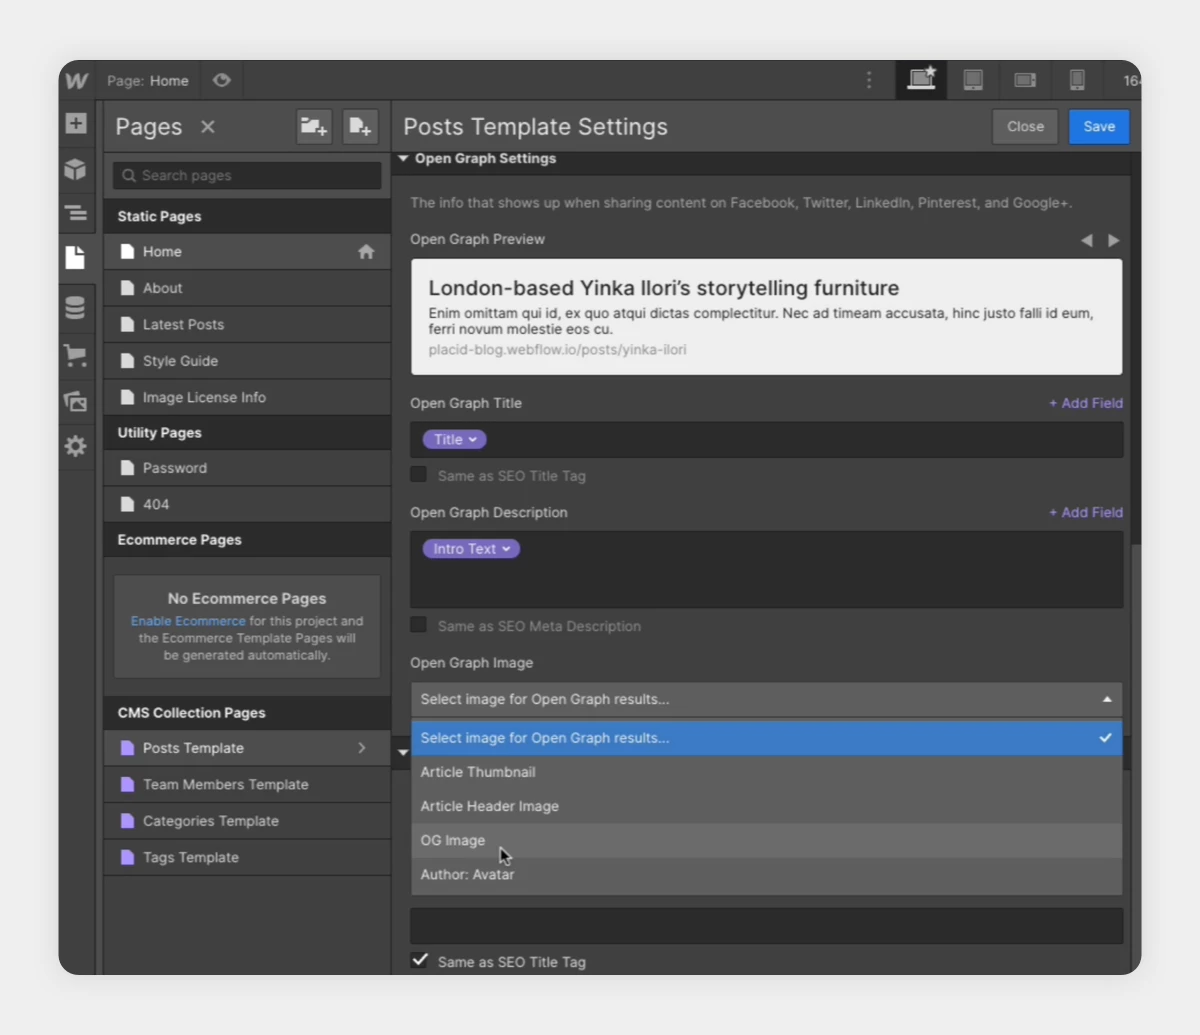
Now we have to make sure Webflow actually uses our generated images in the Open Graph settings. To do this, I chose the field where I saved the Placid images to in the Open Graph image settings. You can find these settings in the template settings of your collection.
Preview your generated Open Graph images
Webflow shows you previews of your social cards, but you can now also test your new Open Graph images in action: Paste your URL on a Facebook post or a tweet. The Facebook Sharing Debugger and Twitter Card Validator also show previews and help you debug your Open Graph data if something's doesn't look right.
In the tutorial video, I used our (free) Social Share Preview browser extension to quickly see card previews. It works on any page you browse and we think it's pretty handy 😊
What's next?
If you successfully automated your Open Graph images with Placid, you may want to think about other images to automate to promote your site. Maybe you want to create Pinterest images, too? Or you want to generate images with article quotes to use in your content?
As you can flexibly choose the input and output fields of your Webflow image automation with Placid, you can get creative with it.
If you have any questions about a workflow you have in mind,