


This tutorial helps you retire all of the Photoshop or Canva templates you use to create images for Pinterest or Instagram manually. With a simple nocode automation with Airtable and Placid you will be able to generate hundreds of social media graphics at once.
To follow along, you will need an Airtable account (a free plan will work!), as well as an account for Placid. If you just want to try it out you can use our free trial.
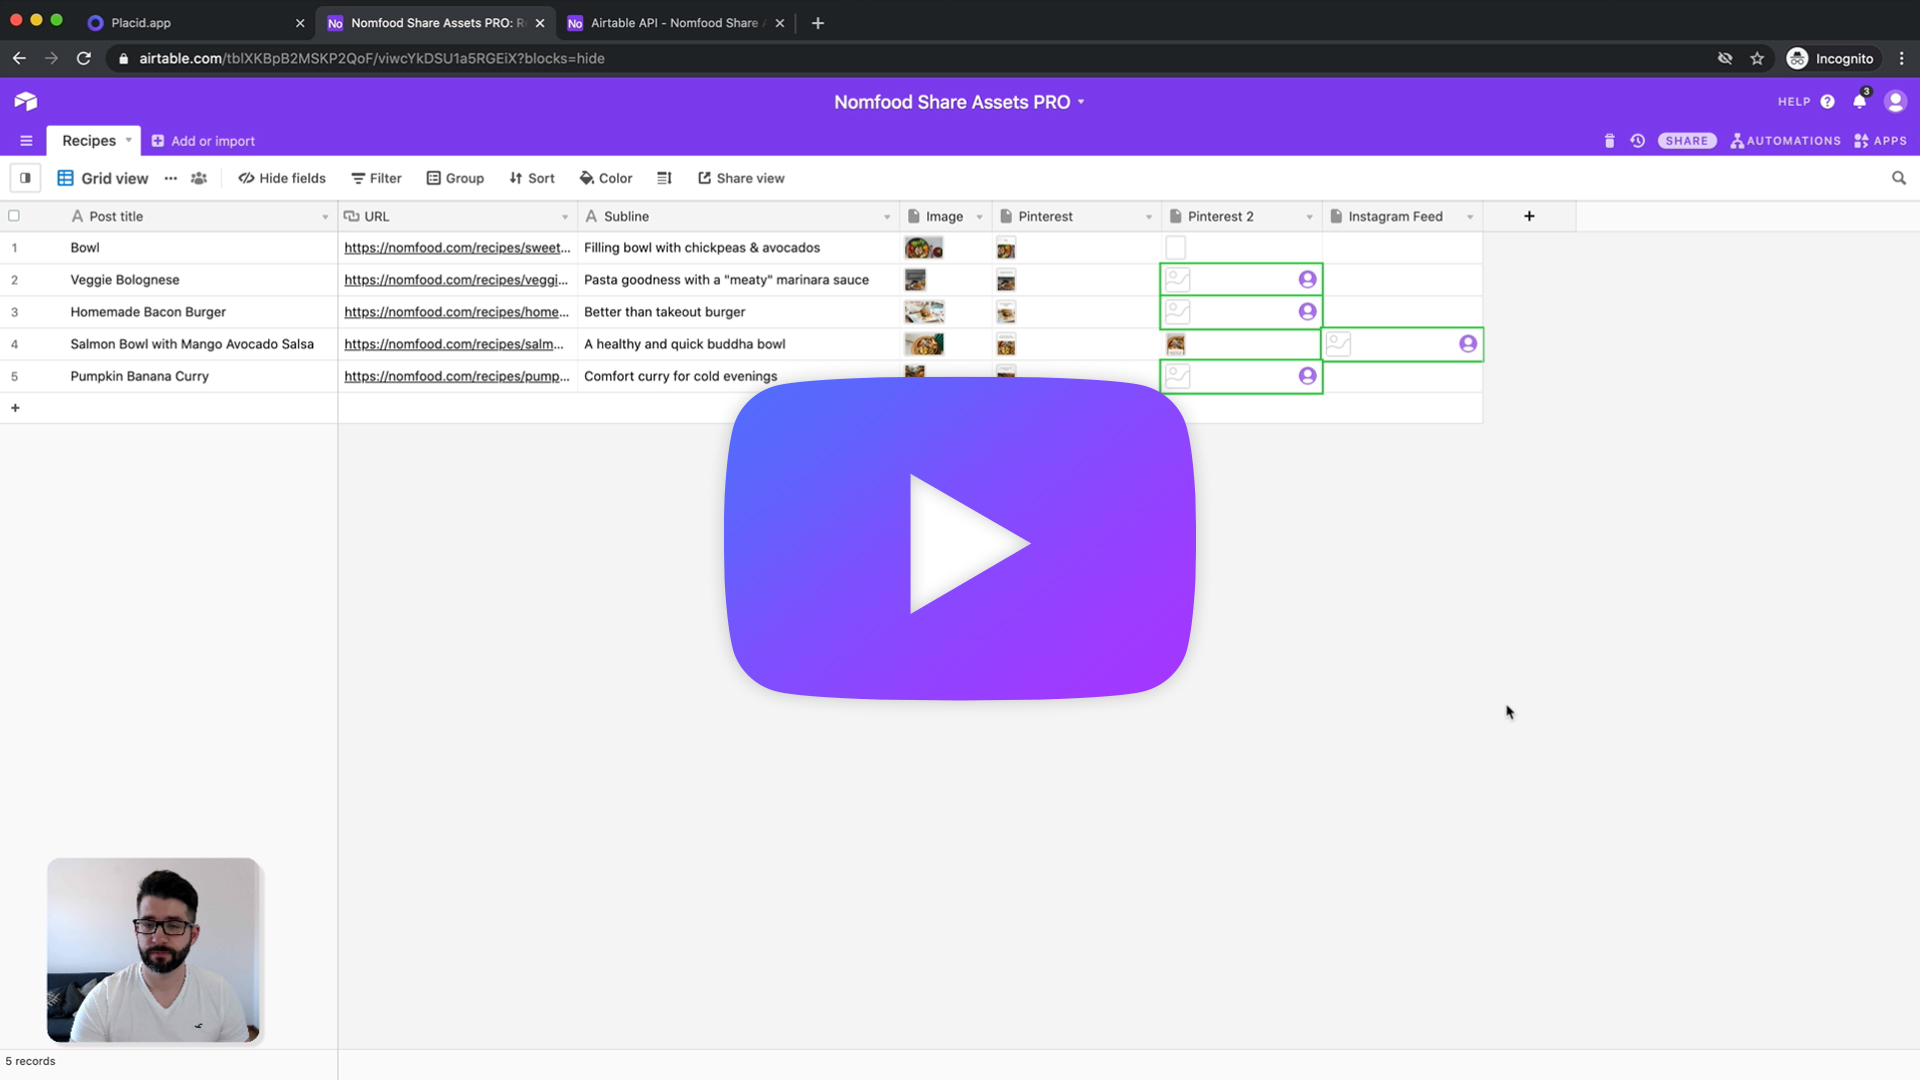
Video Tutorial
Create a Placid project and template
In Placid, create a new Airtable project to start your setup.
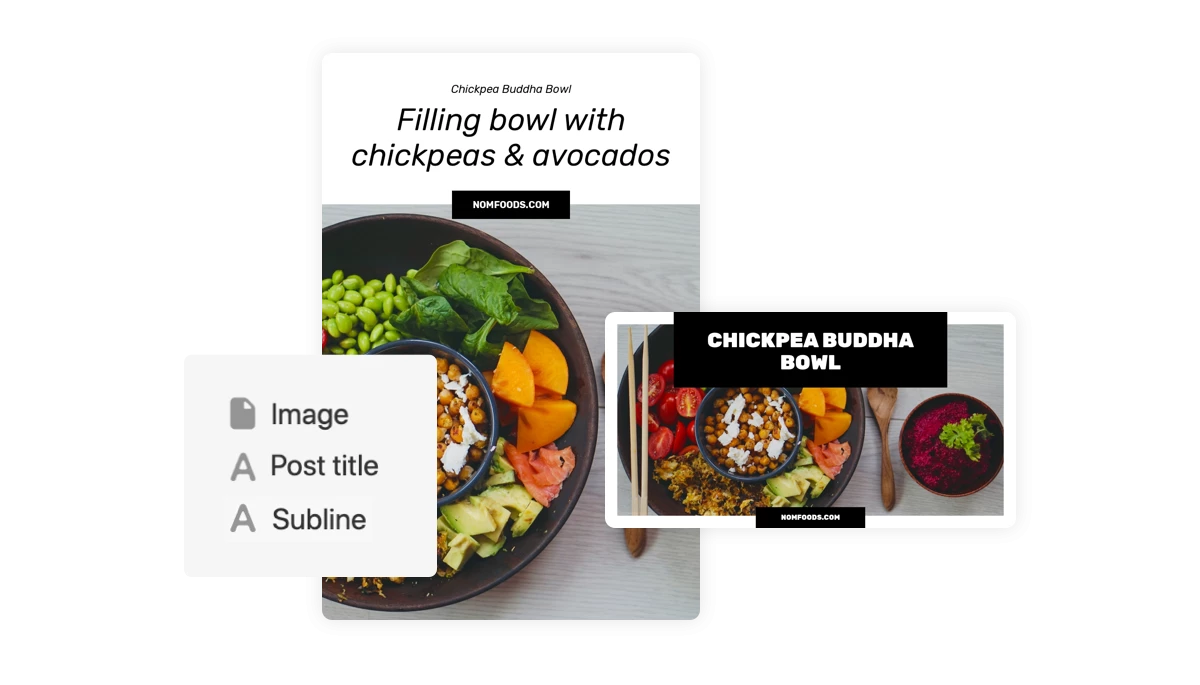
Within the project, you can create a template. For this tutorial, I used some of our preset designs – two Pinterest templates and one matching Instagram feed image. Later, the text of the title as well as the photo will be dynamically replaced with data from our Airtable to generate variations.

For your own workflow, you can choose any other preset you want or design custom templates that fit your use case with our editor.
Prepare your table
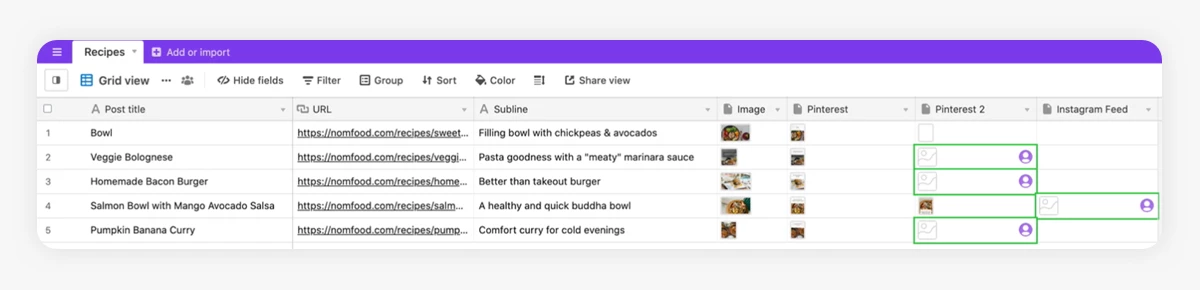
For this tutorial, I created a new Airtable base and prepared a simple table with a few fields. Important are the Post title (text field) and Image (attachment field). My table also contained a URL to the blog post (optional, URL field), and a subtitle for the article (optional, text field) – but I didn't use them in this tutorial.
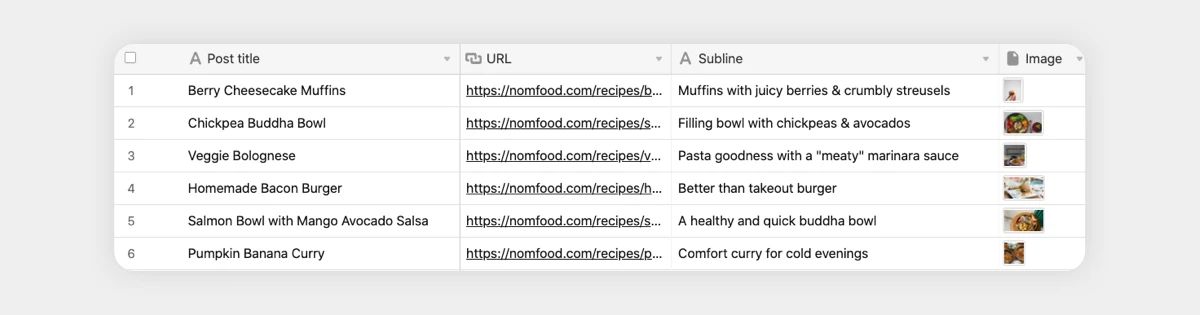
Then I added three attachment fields ("Pinterest", "Pinterest 2" and "Instagram Feed") where the generated graphic variations will be saved later. (Leave them empty for now!)
You can choose custom titles for your fields, or even use existing tables. We can choose which data we're going to use for the image automation later in the setup process.
Connect Placid with Airtable
To be able to read and write data from and to your tables, you need to connect your Placid project. To do this, add your Airtable API key in the settings.
Switch to the Project Settings tab in the left menu of your Placid Airtable project. Grab your Airtable API key in your Airtable account settings and paste it in Placid.
Add a Placid image automation action
Airtable image automations can be set up using Placid actions. Go to the Actions tab in the left menu of your Placid Airtable project and add a new action.
You will see a multi-step form that helps you configure an image automation for one template.
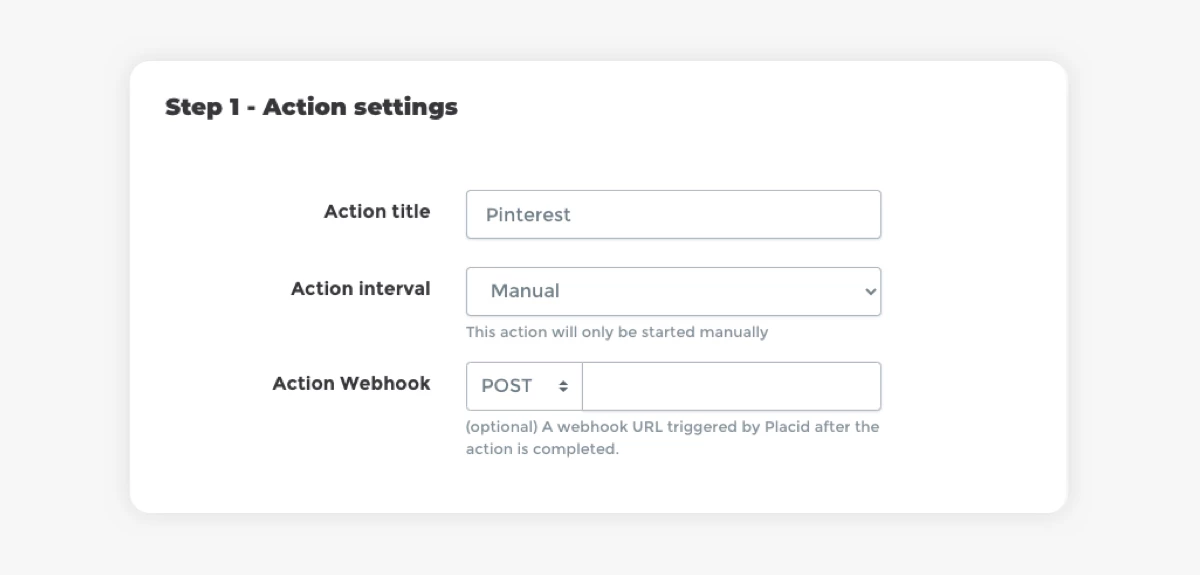
Action settings
Choose a name for your action and set an interval (how often and when should the action run?). You can leave it on the manual setting for now.
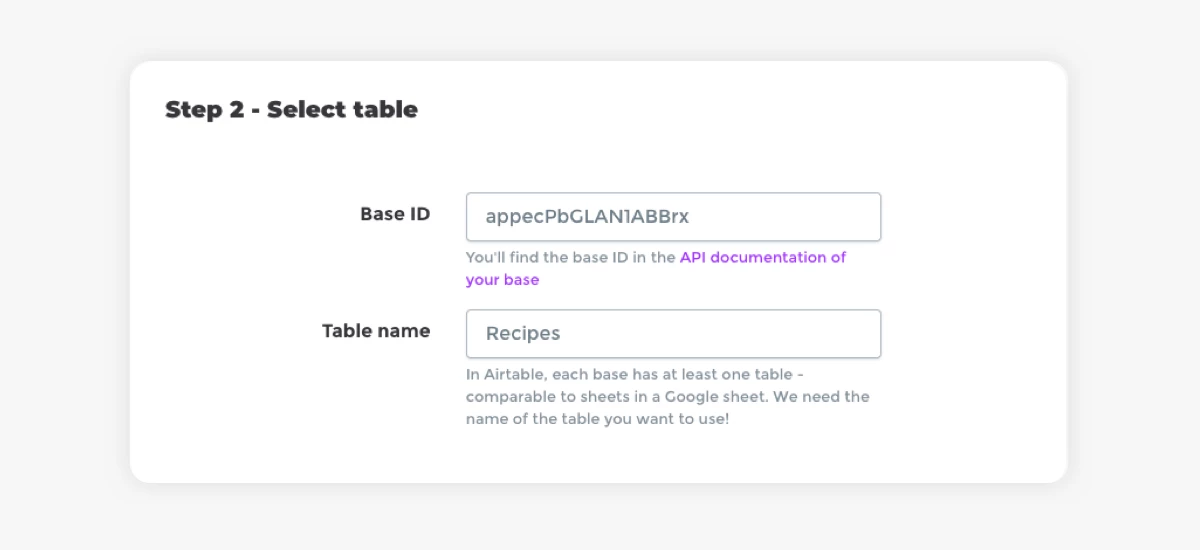
Select table
Copy the Airtable Base ID from the API documentation of your base and the name of the table (= "sheet") within the base that you want to use for this automation.
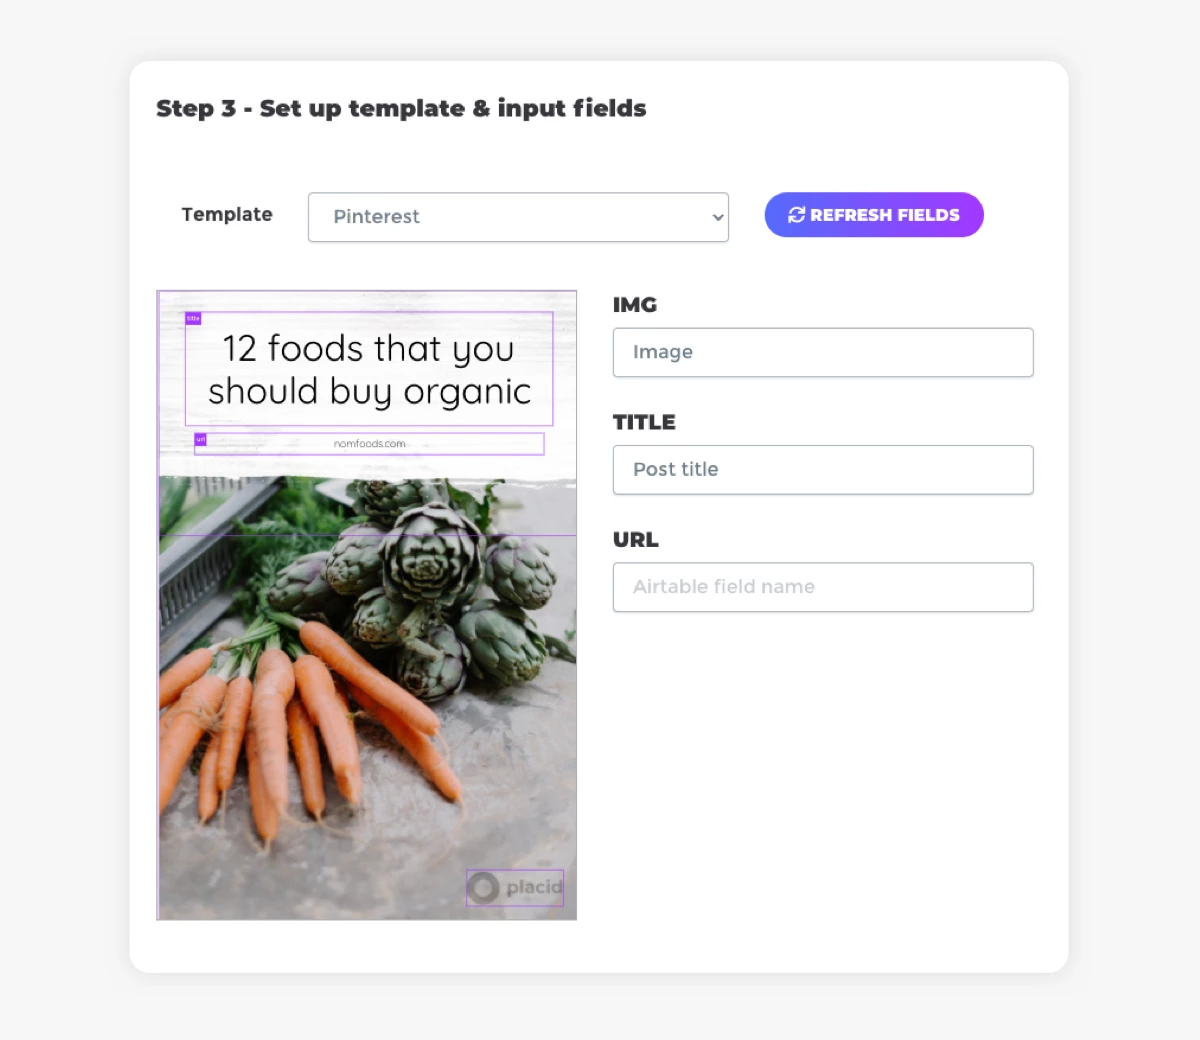
Set up template & input fields
Choose a template you want to use and map the field names of your Airtable to the layers of your template. This tells Placid where the data for the variations comes from. For the first action, I mapped the Image field to the image layer of my template, and the post title to the Title field. I decided to adapt the default value of the URL text layer of the template in the editor instead of mapping my Airtable URL field to it - that's why I left the mapping field blank.
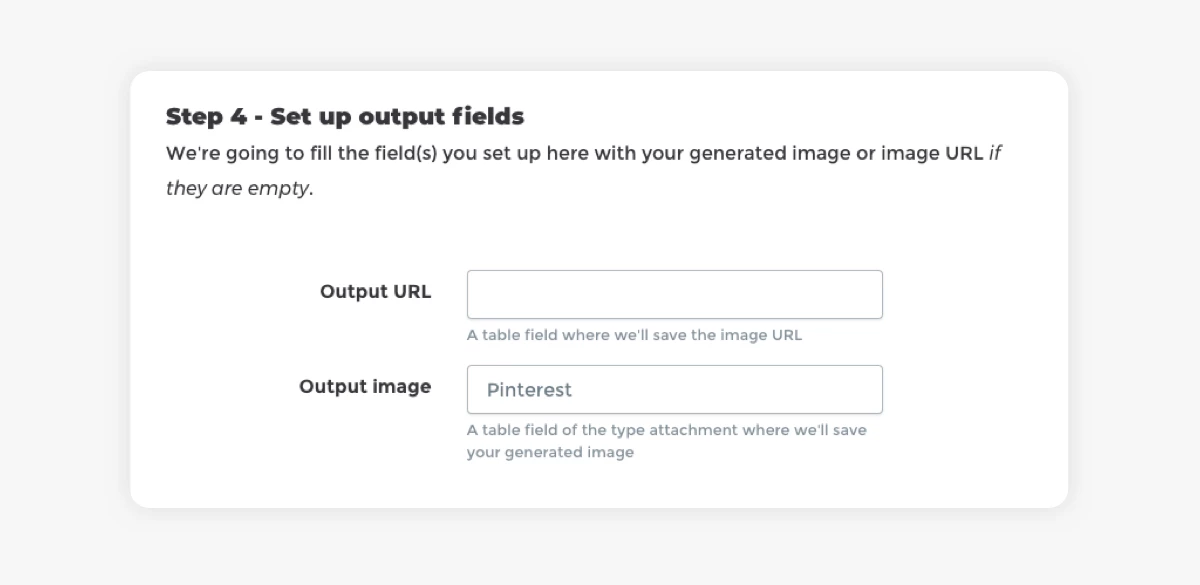
Set up output fields
Decide in which field the generated image (or its URL) should be saved. Use the name of the attachment field we have created for this purpose earlier (f.ex. "Pinterest") as "Output image".
Create the action to finish the setup.
Test your workflow
Once you finished configuring your action, you can test it. Run the action to generate your images and send them to your Airtable. Placid will never overwrite any data from your Airtable, but if you want to be extra safe you can use the "Test run" functionality. It shows you a preview of the images that would be generated and the info where Placid would have sent them.

The generated images should now automatically appear in the output field in Airtable. I'm probably biased, but I love to watch them roll in 😊
If you want to retry the image generation - f.ex. after changing something in your template – just delete the images from your table and run the action again. Remember, we don't overwrite any content by default!
Create more templates & actions
If you're happy with the outcome, you can start designing more templates for all the types of social media graphics that you need for your blog.
You can duplicate your action and quickly modify it for different templates.
In this tutorial, I used three different actions for Pinterest and Instagram feed images, so I ended up with three actions.
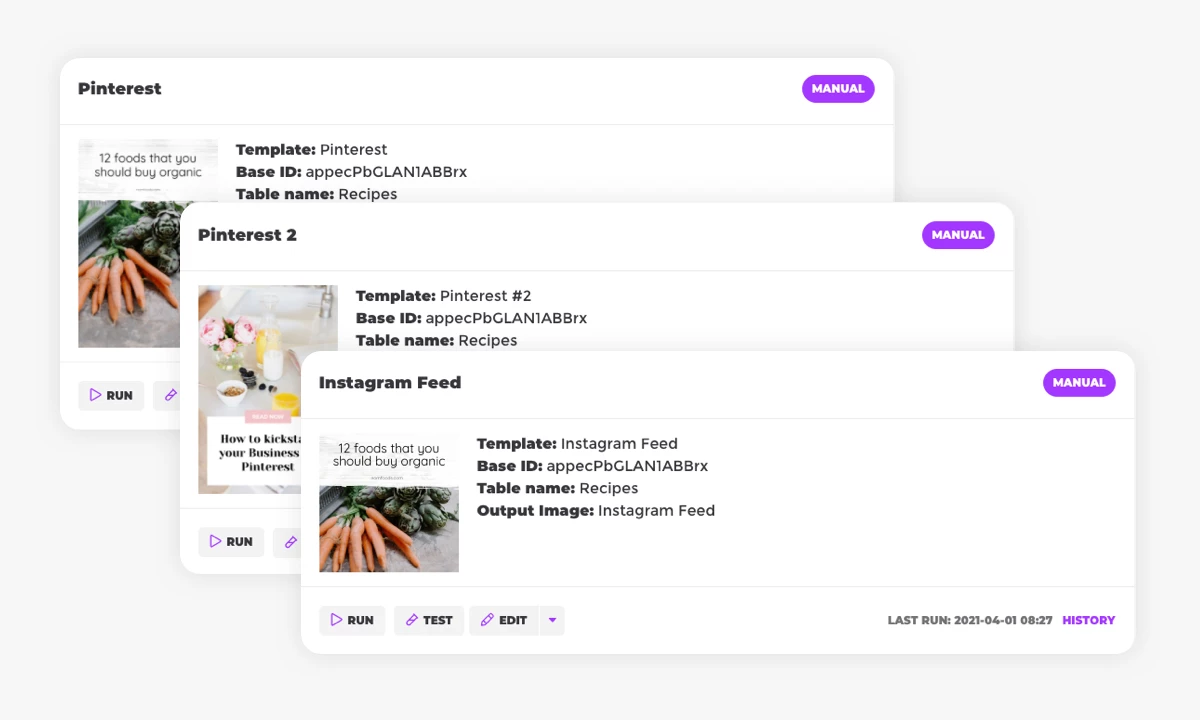
With this setup, I can now quickly generate three social media graphics per blog article on-demand.
What's next?
If you want to advance your image automation setup further, you have a lot of possibilities:
- Flexibly use additional Airtable fields like the subline field from my example table for some of your actions. This is great to generate different variations of Pinterest images.
- Set up a button to run all your Placid Actions directly from Airtable (without even logging into Placid). We offer a script for that in the Placid project settings.
- Set up your actions to auto-generate images whenever you change or add data in Airtable. This is also possible by using a script for an Airtable automation that you can find in your Placid project settings.
- Set up your Placid action to call a webhook URL after a run to further automate your workflows, or just schedule the action to run in a daily interval.
Adapt this workflow to your own needs and create your own social media graphics studio with Placid & Airtable 🥰
If you need help with a specific setup,